Editing Spec Sheet Fields
Dimensions, materials, images, rich text, and the dual-language workflow.
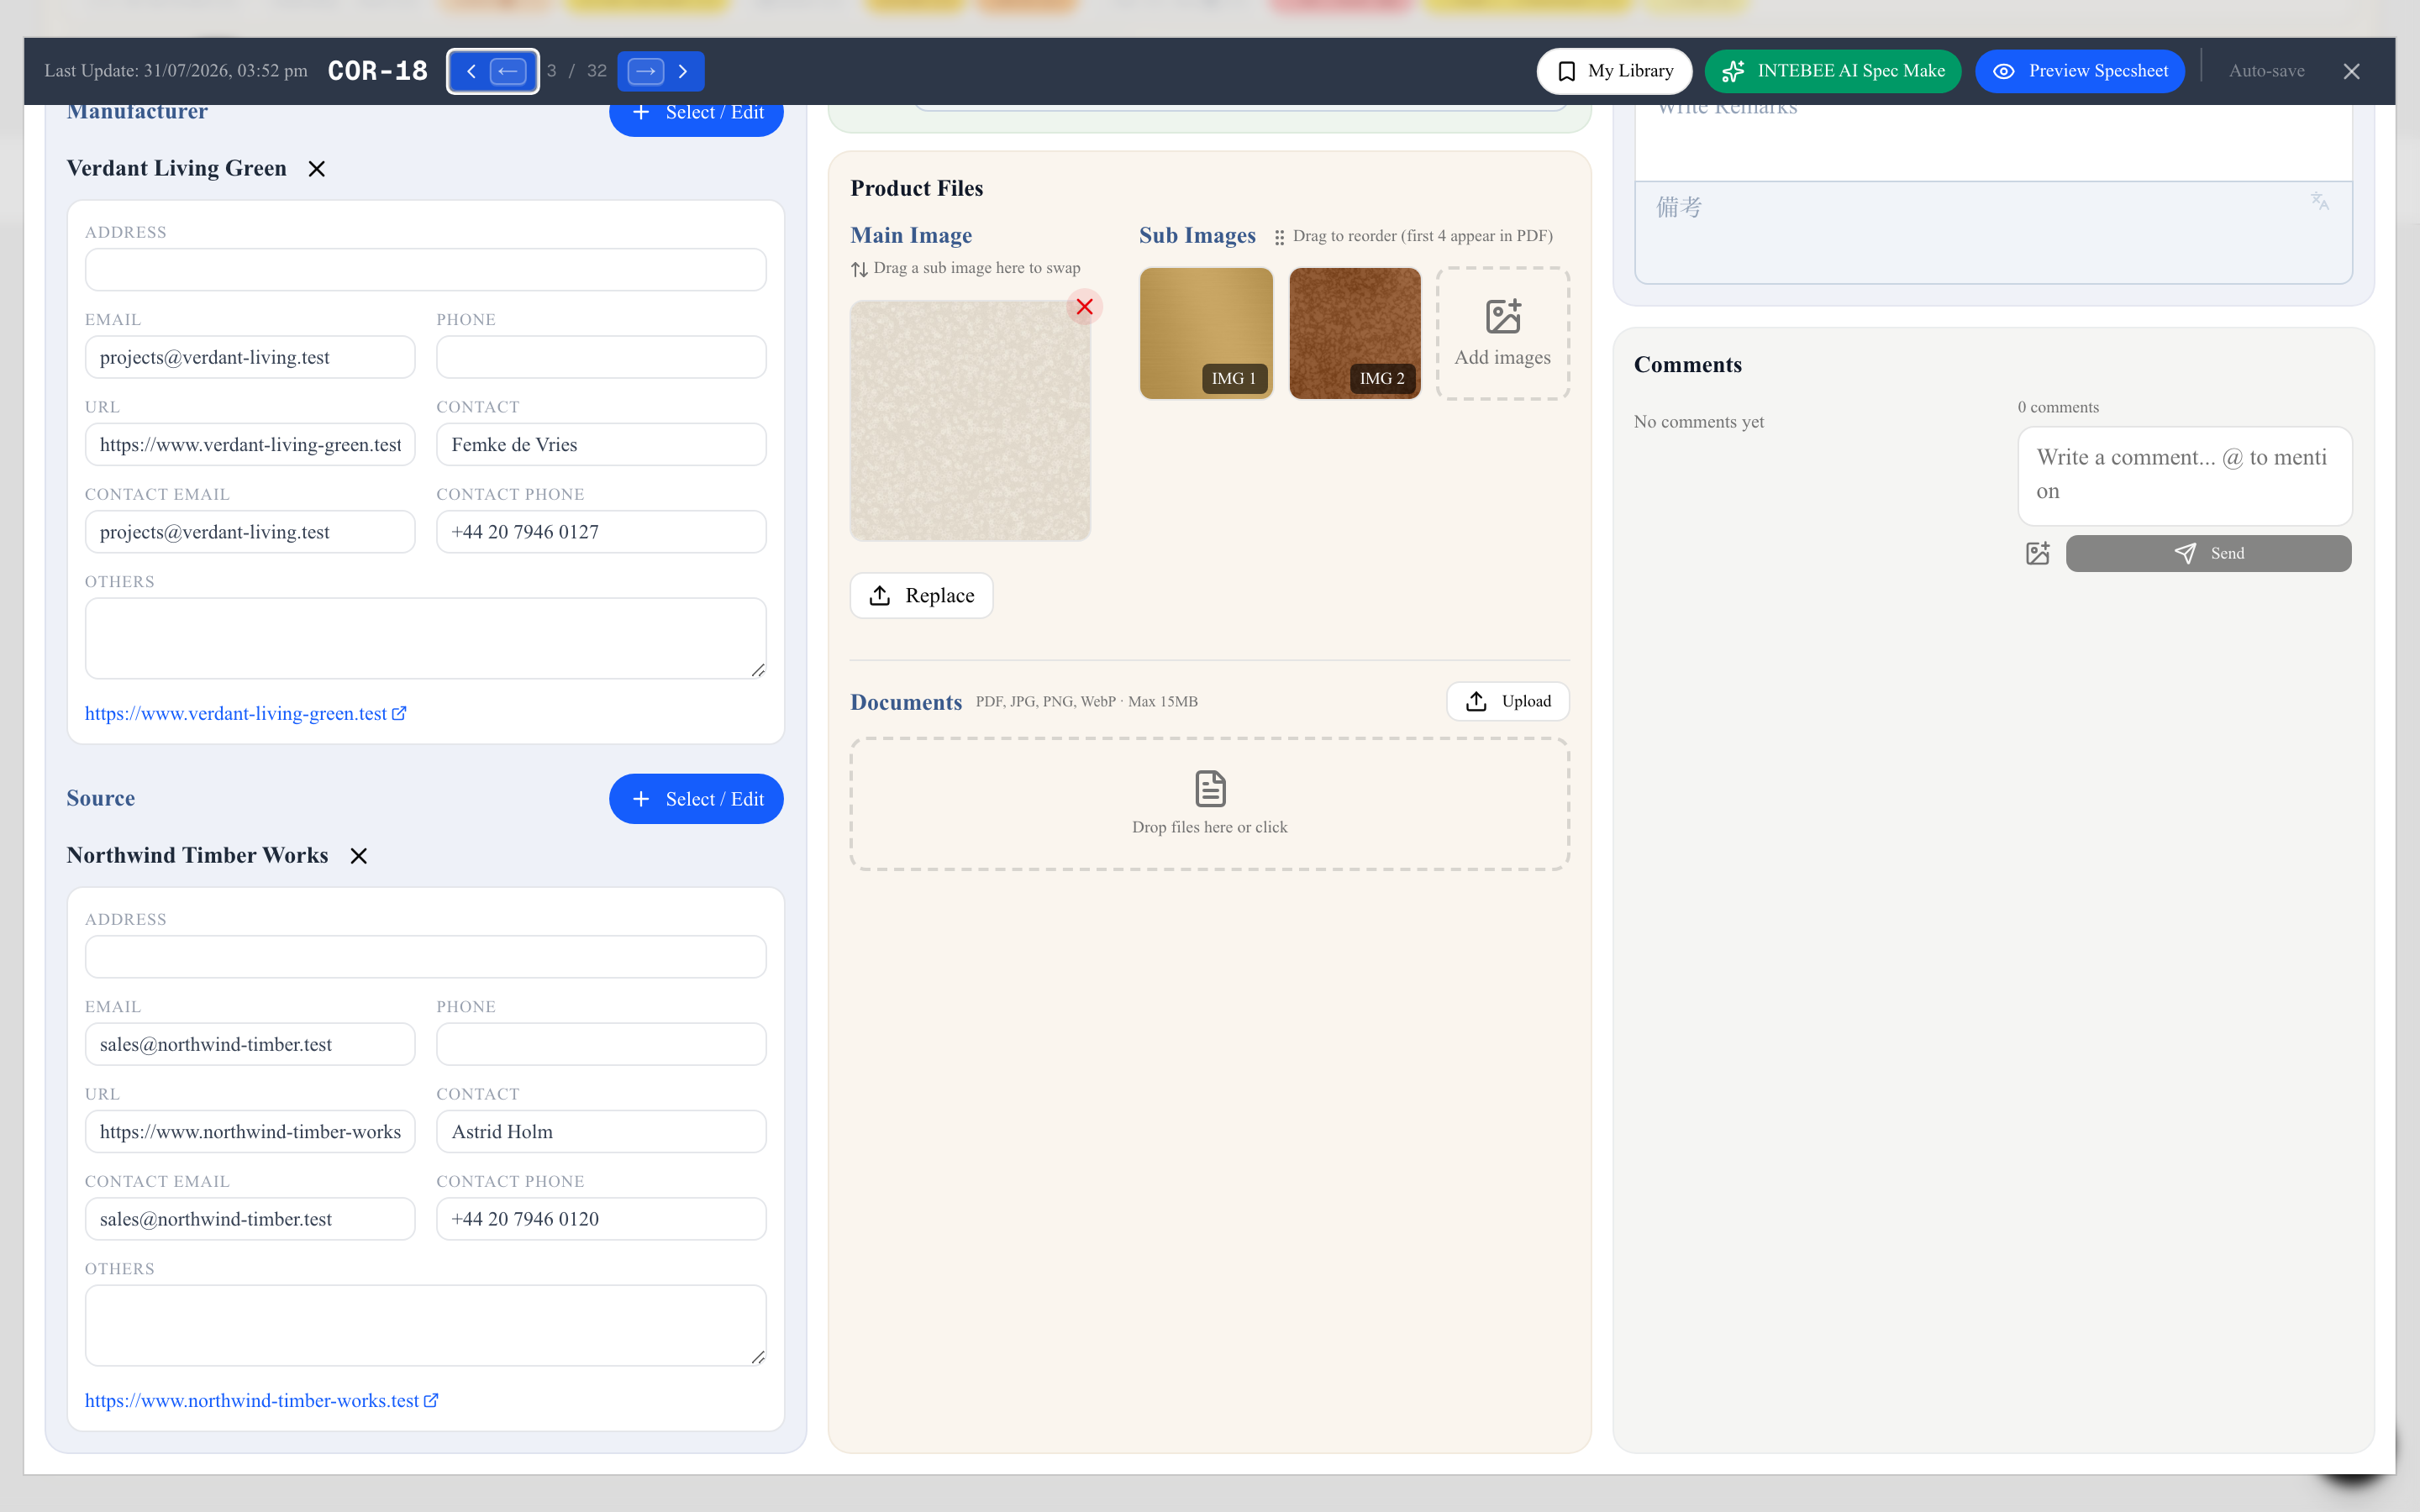
Open any spec sheet to edit it. Every field saves by itself as you leave it — a Saving… / Saved badge in the header tells you where you are — and every change is tracked in the project log.
Typing into these fields is how a spec sheet is normally built. AI Spec Make and Import from Product are shortcuts that pre-fill the same fields — whatever puts the text there, you edit it here.
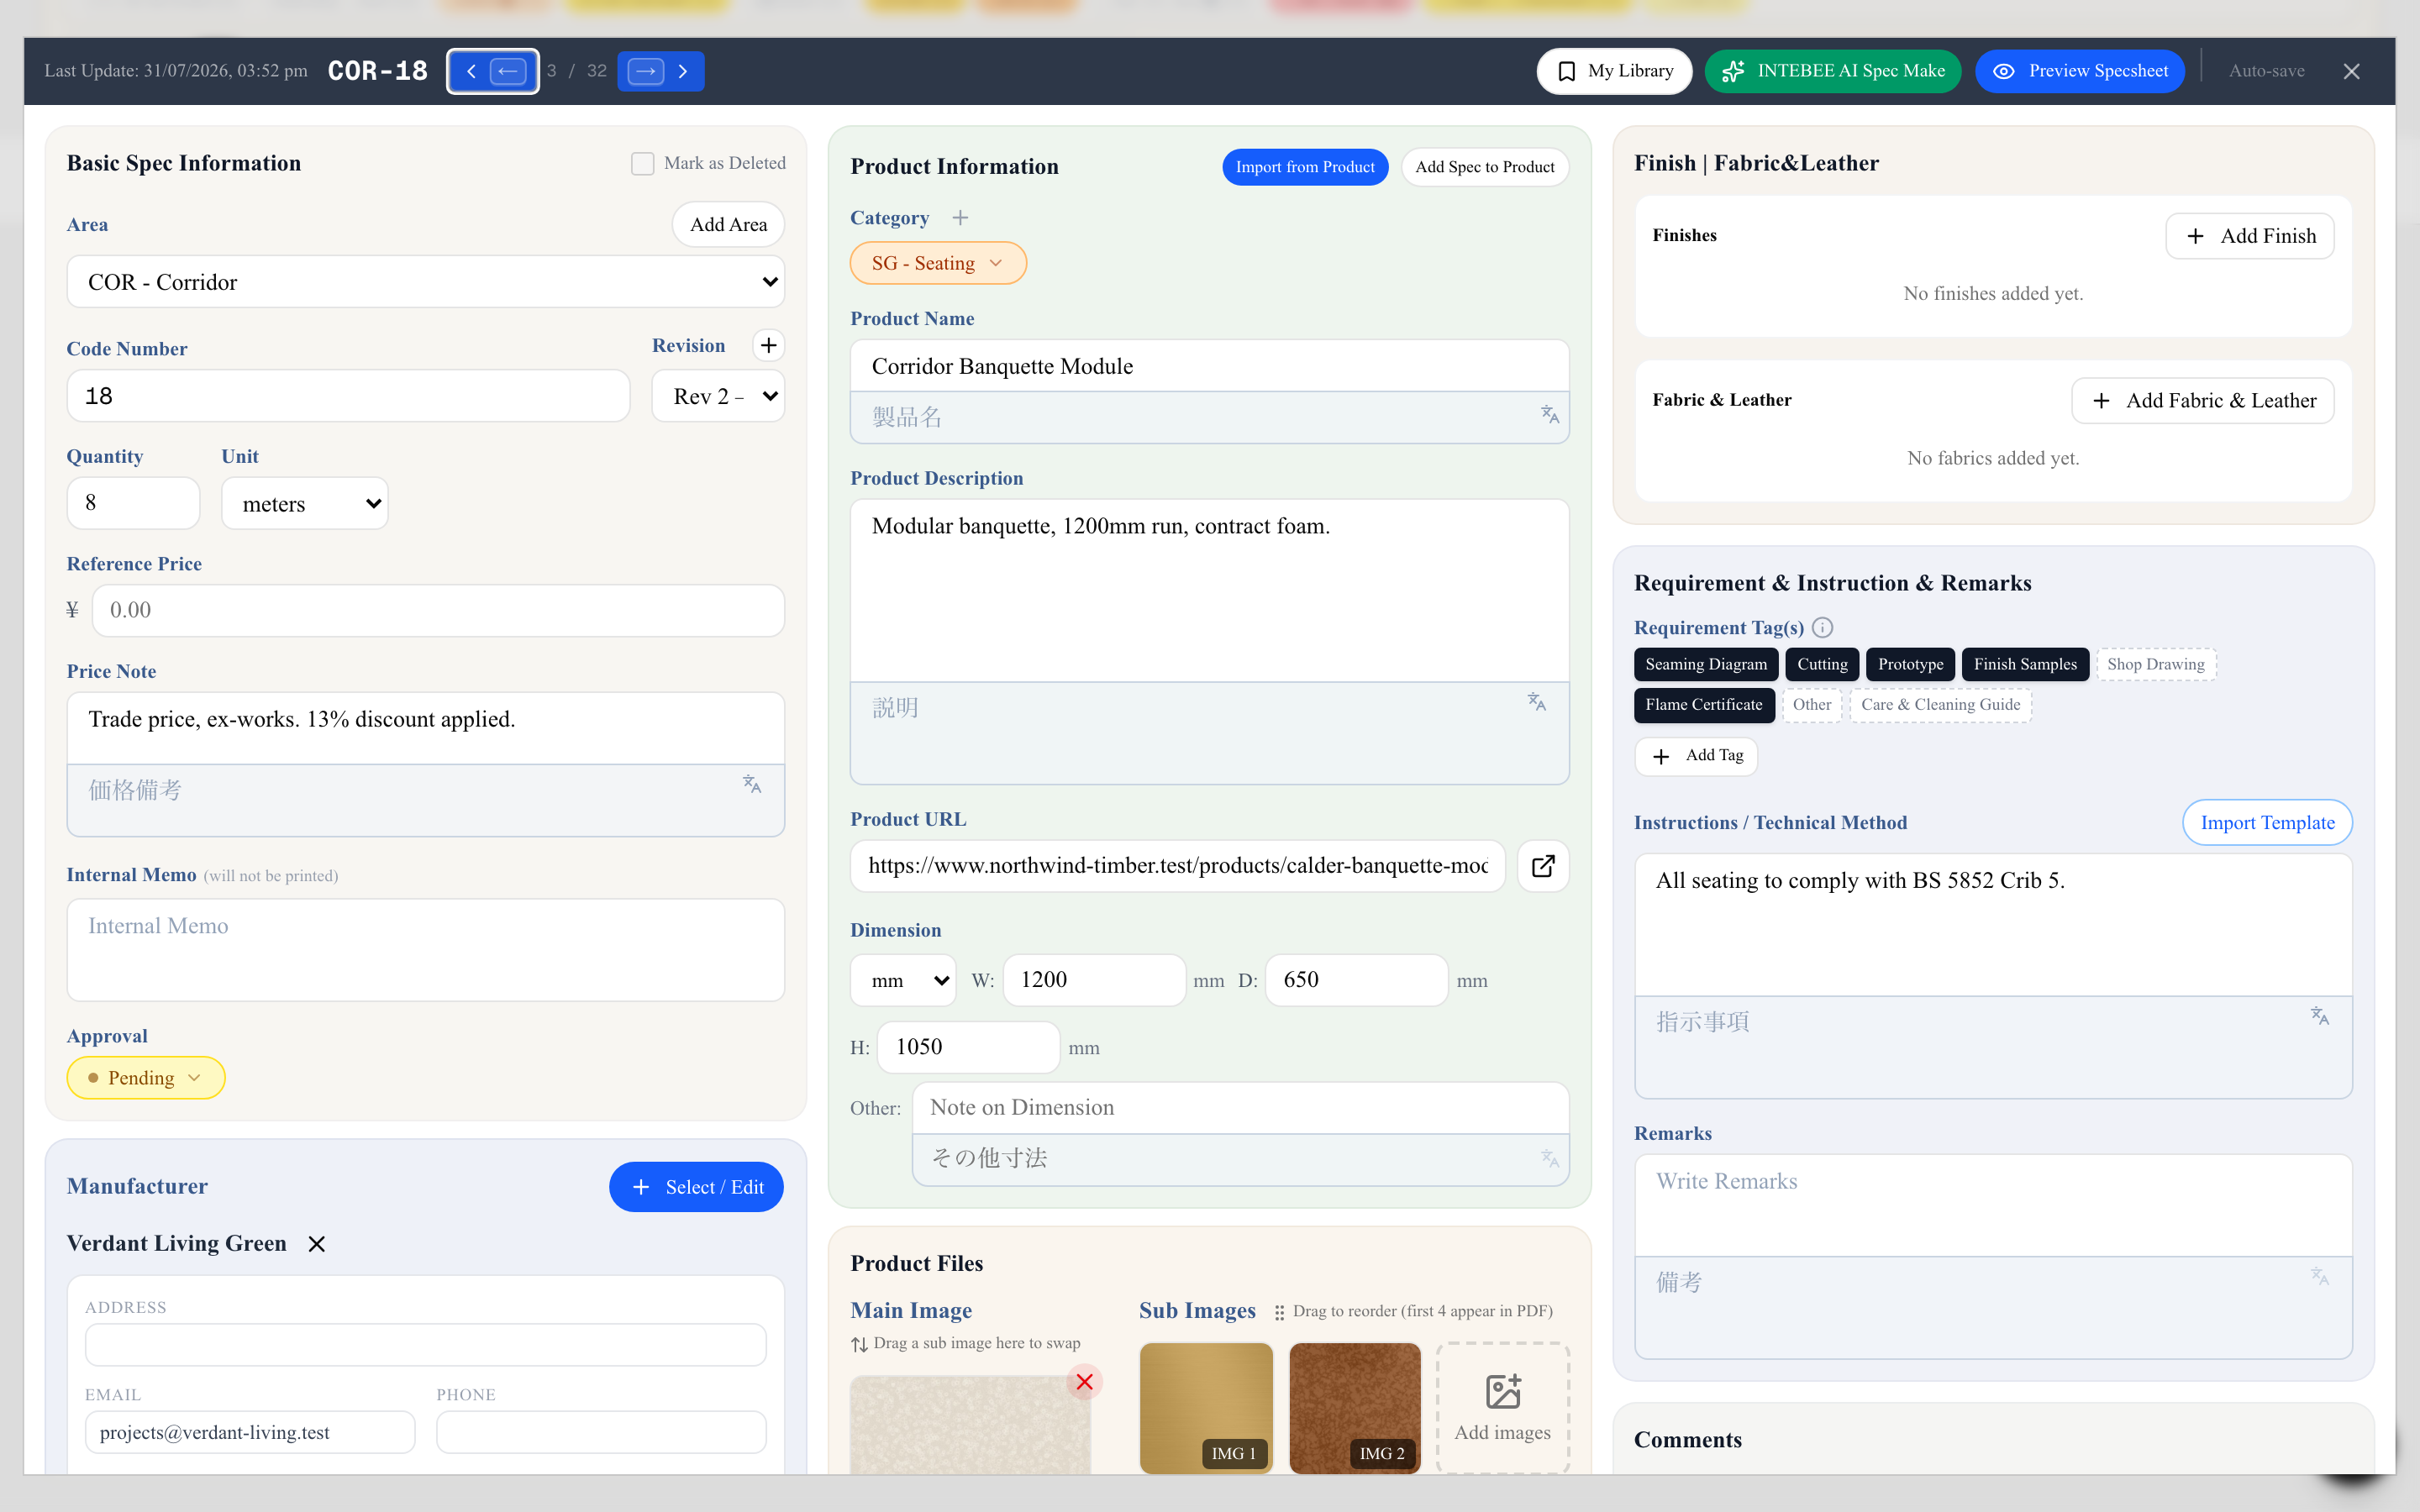
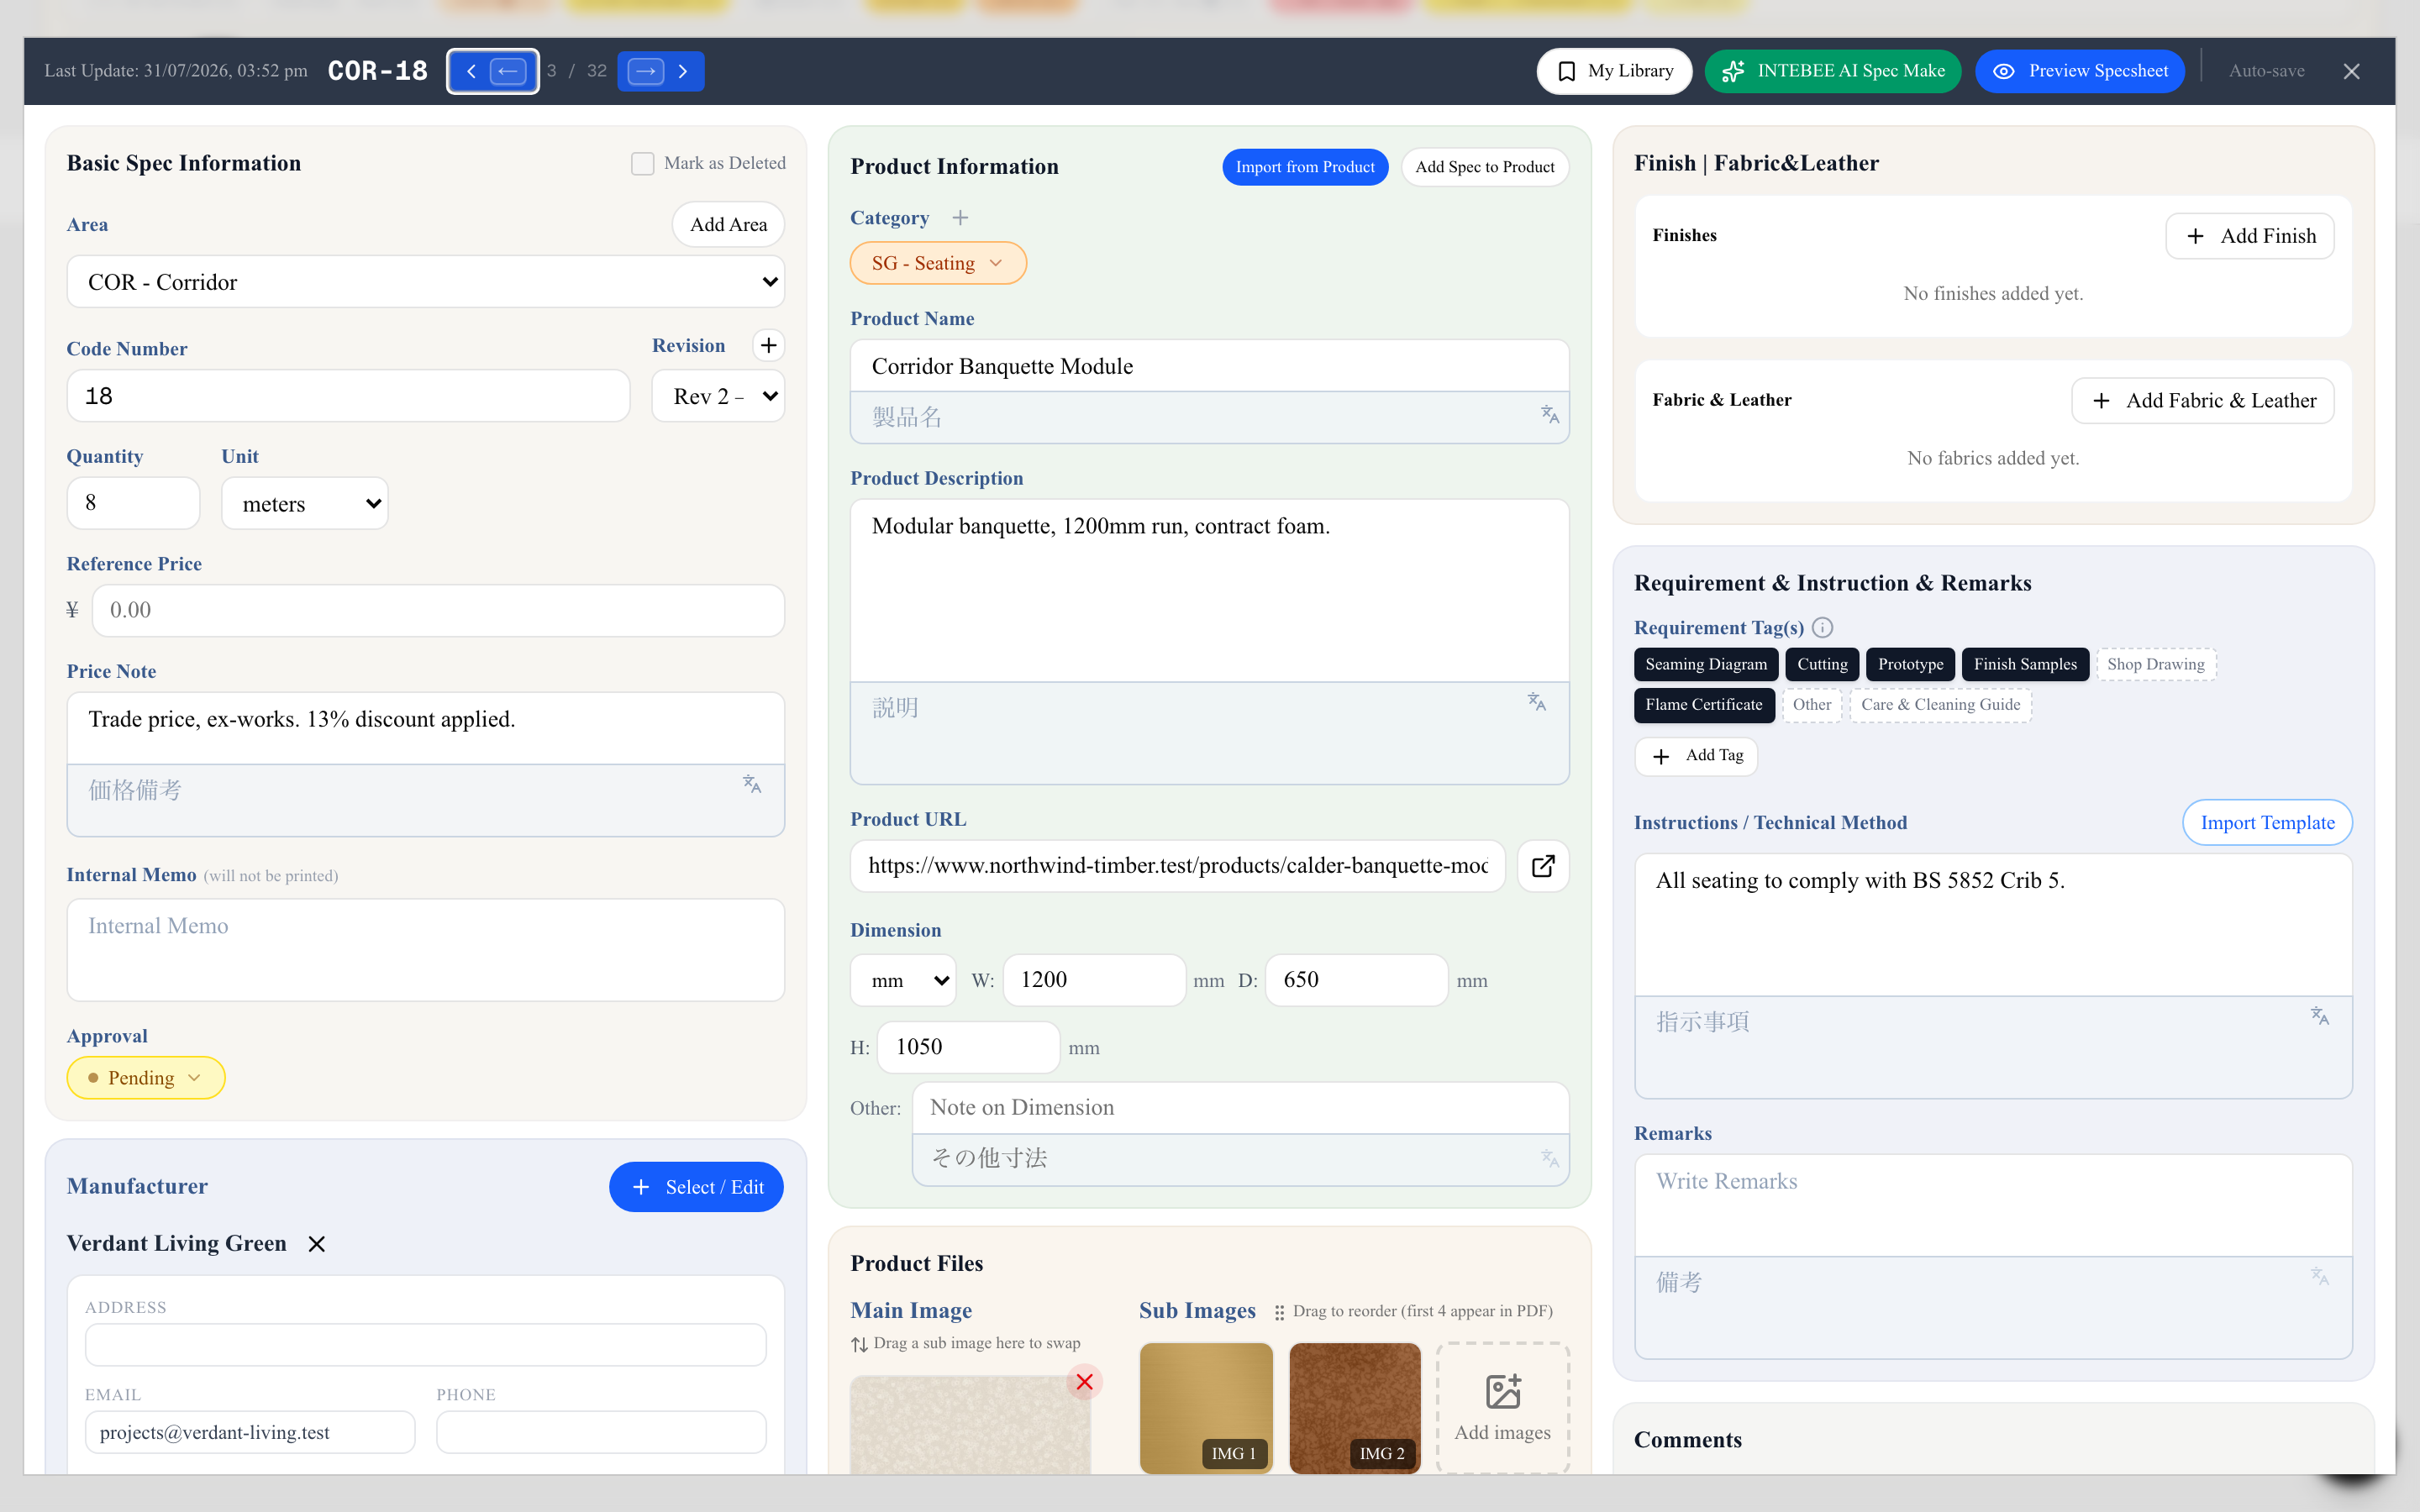
The editor is three columns:
- Product Information — category, name, description, dimensions and the product URL — with the Manufacturer and Source blocks beneath it.
- Basic Spec Information — Item Code, area, revision, quantity and unit, price, status — and below it Product Files, the images and documents attached to this sheet.
- Finish | Fabric&Leather, then Requirement & Instruction & Remarks, then Comments.
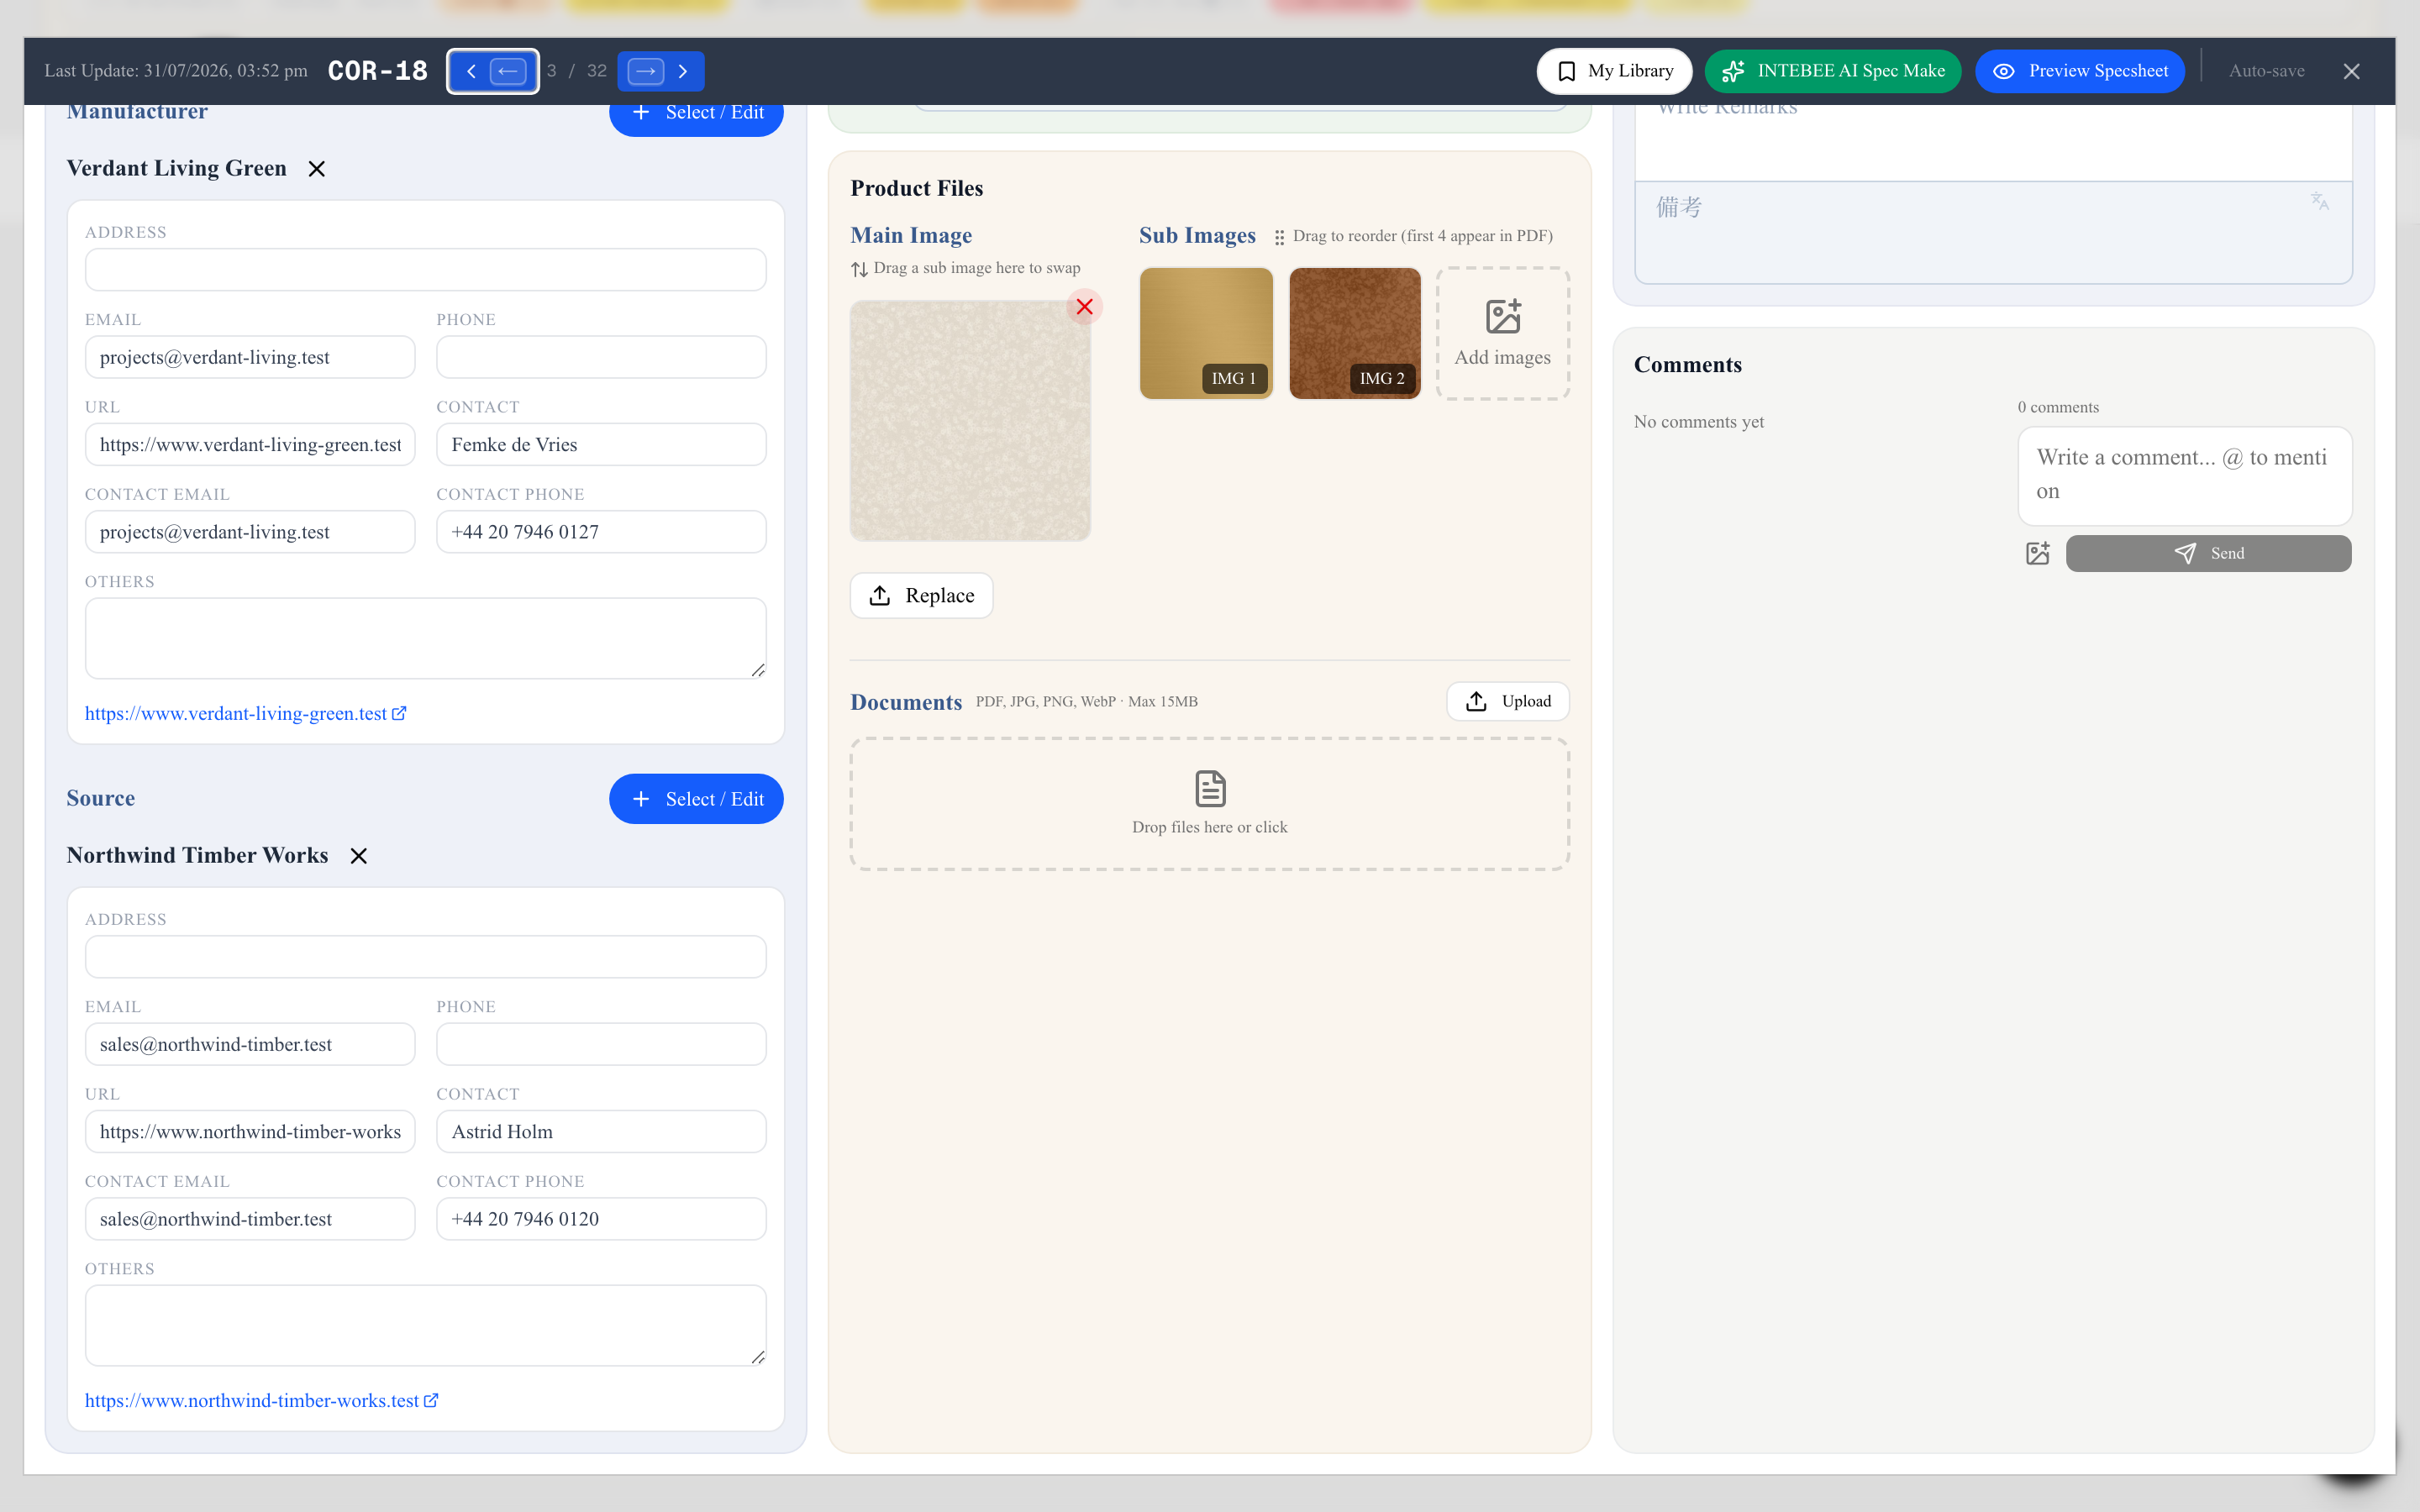
Area opens a list below the field with each area's code in its own column; on a long list, type a code or part of the name to narrow it. Quantity and Unit are on every spec sheet — finished products, Finish and Fabric & Leather alike — including categories that hide the area code.
Quantity is optional. Leave it empty and it stays empty — the editor does not turn an empty Quantity into 1 — and the printed spec sheet and the PDF leave the Quantity field out. On a Fabric & Leather spec sheet, Quantity is filled in automatically from the amounts other spec sheets require of that fabric; it is then read-only and marked (Auto). See Finishes, fabrics & leather.
Manufacturer and Source — per-project details
Attach a company with Select / Edit and its card appears under Product Information, editable in place: Address, Email, Phone, URL, Contact, Contact Email, Contact Phone and a free-text Others box for anything that doesn't fit a field — the local agent, the account number, "quote via Milan office".
Editing that card does not change the team's record. It is stored as this project's override: everyone on the project sees your version, nobody outside it does. So the shipping address you learned for this job doesn't overwrite the head-office address that ten other projects rely on.
A field the project has changed is tinted amber, and a line under the card says Changed for this project only — the team's record is unchanged. Three buttons appear with it:
- Update Team Manufacturer / Update Team Supplier — this project got it right for everybody, so push the values up to the team record. The tint clears, because there is nothing different any more.
- Use the team's values — drop the project's overrides and inherit again.
- Ignore — you know it differs and that is fine. The notice and the amber tint go away until these details change again; the override itself stays. A change to the team's record brings the notice back too, so you see when the team has moved on from the values you kept.
Anything that differs from the team's value is the project's own — an emptied box included. Clearing a field does not make it inherit again; only Use the team's values does that.
See Sources — manufacturers & suppliers for the team-level record itself.
Dimensions and units
Enter width / depth / height plus a free-form dimension note for anything unusual (seat height, arm height…). New sheets start in the project's Dimension Unit (Project Settings → Code Settings), and the printed sheet formats dimensions consistently.
Finishes, fabrics, and leather
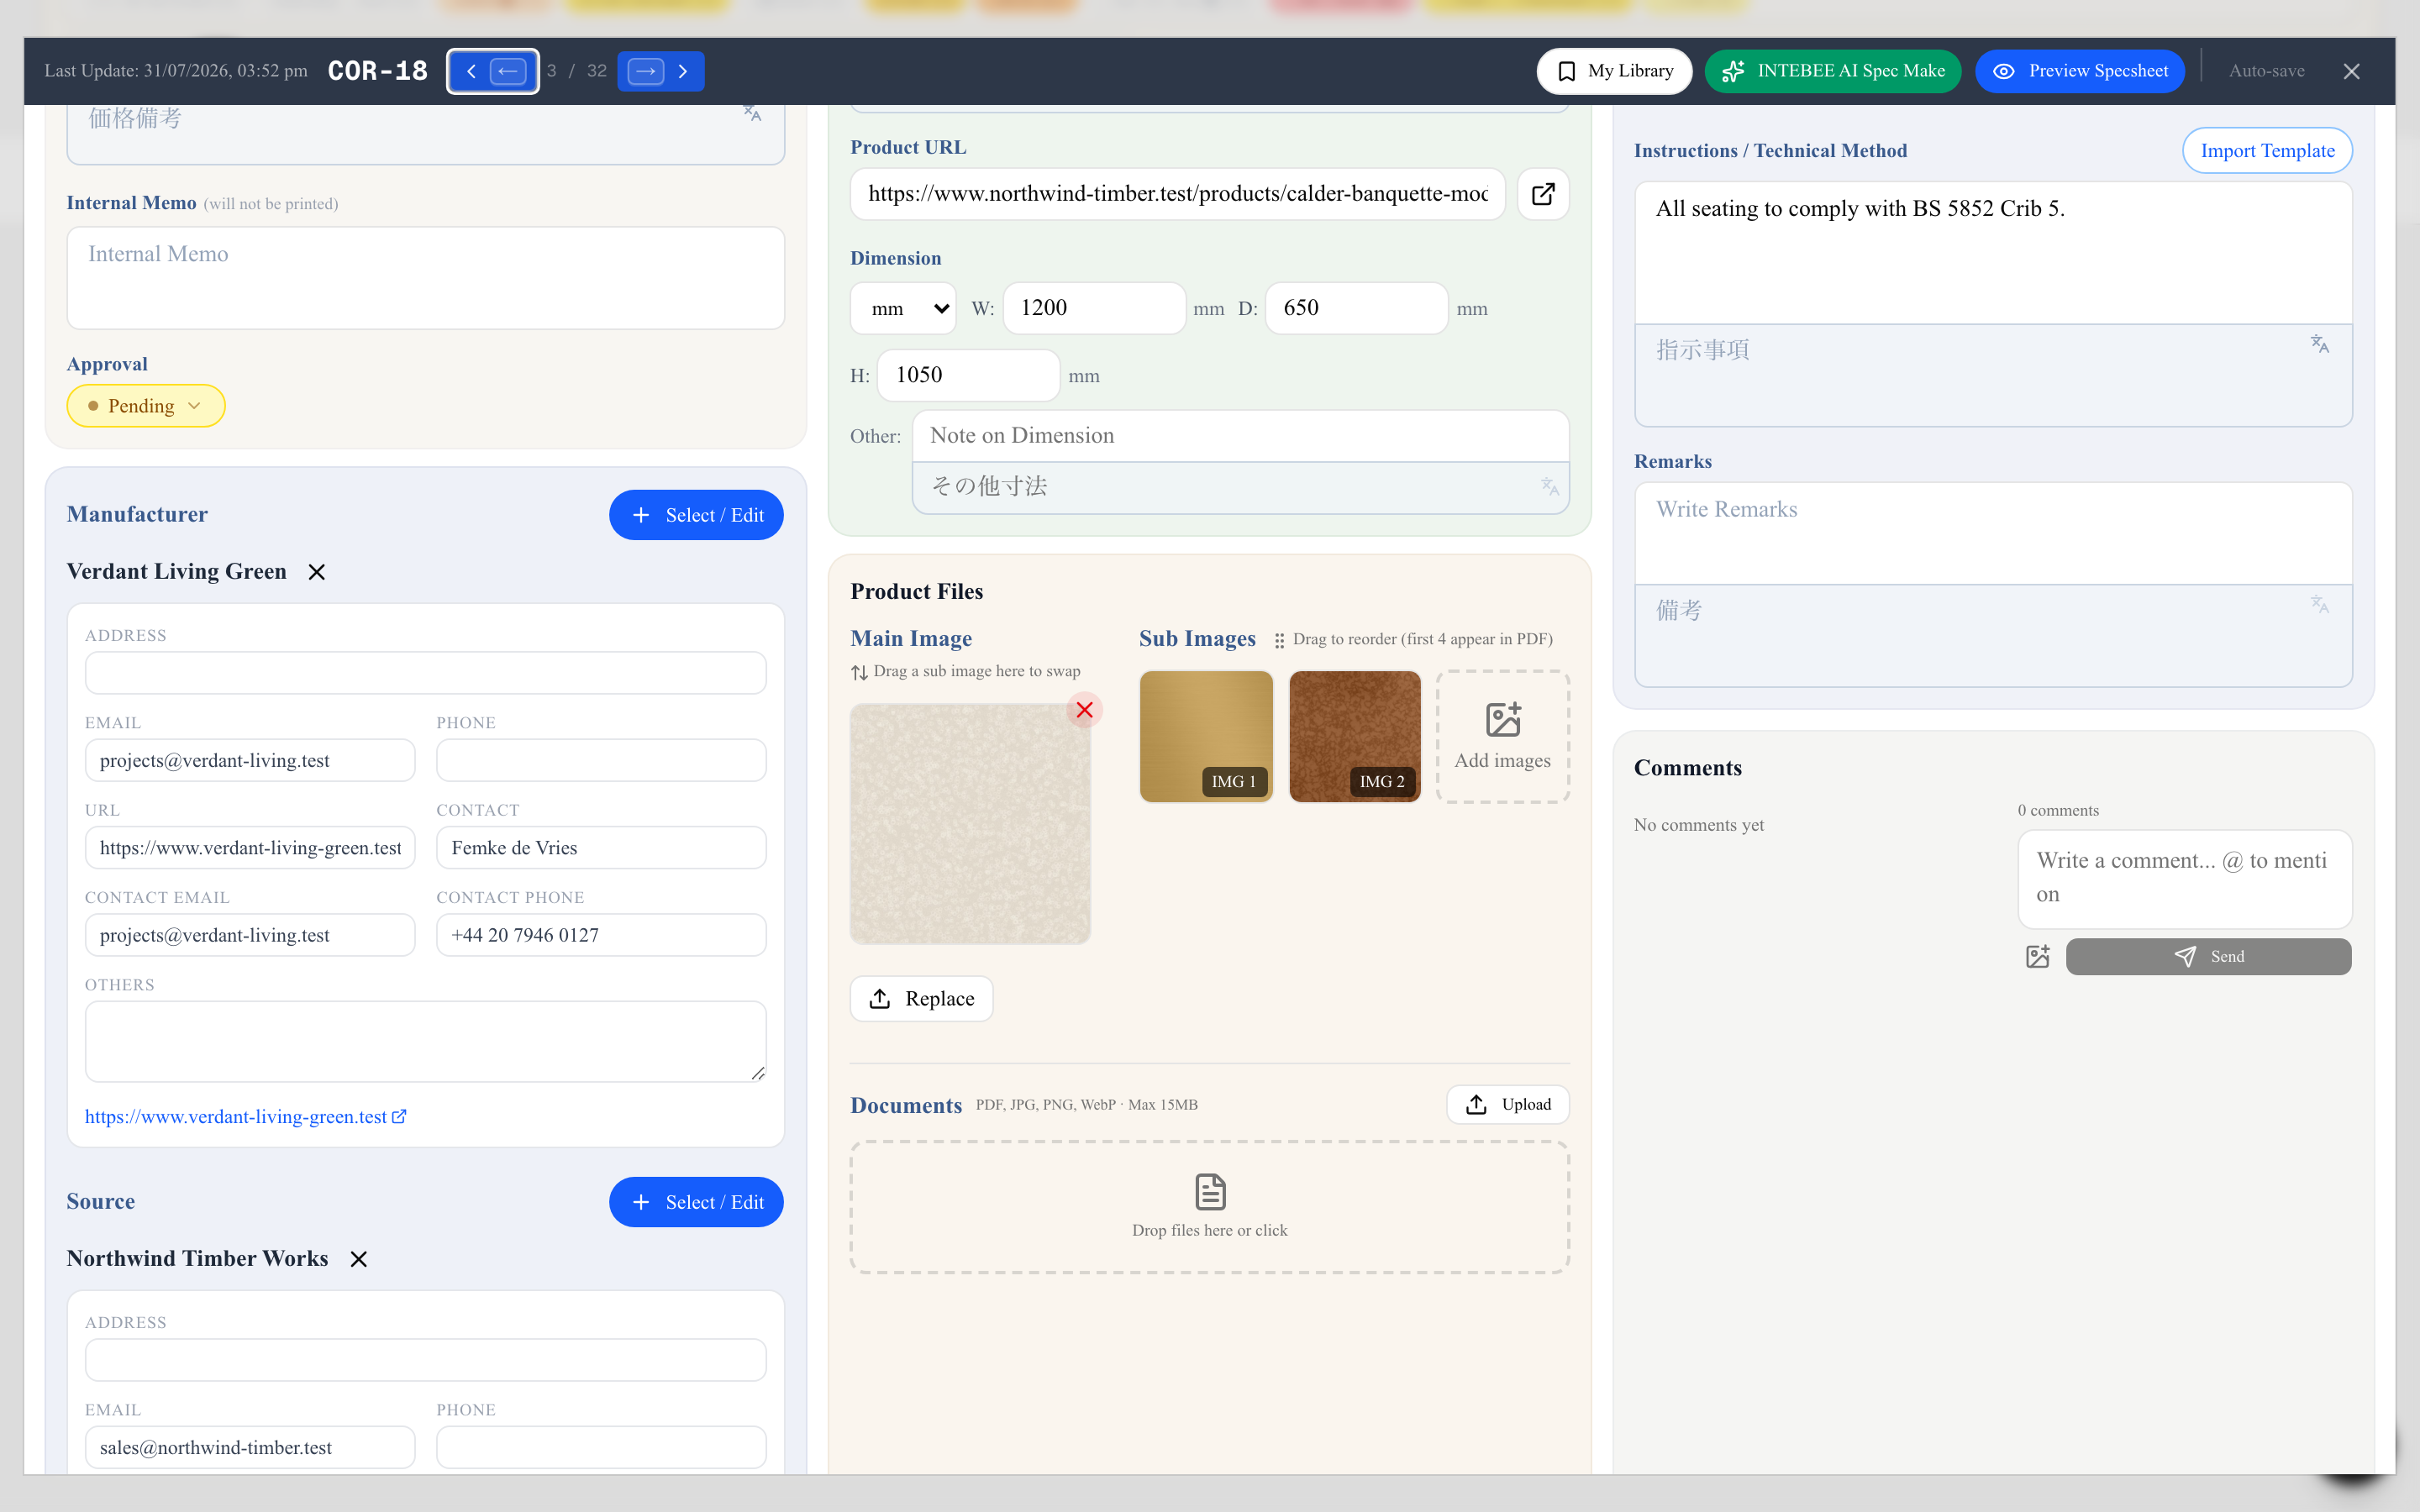
The Finish | Fabric&Leather panel at the top of the third column records what the item is made of. Each entry points at another spec sheet — the oak, the marble, the bouclé — and carries the detail that is specific to this item: the Location where the material is applied, an internal Note, and, for fabrics, how much is required per unit and in total.
Click Add Finish or Add Fabric & Leather to pick an existing material spec from the project or create a new one. The linked materials print as a swatch block on the sheet, and can be exported as full pages of their own.
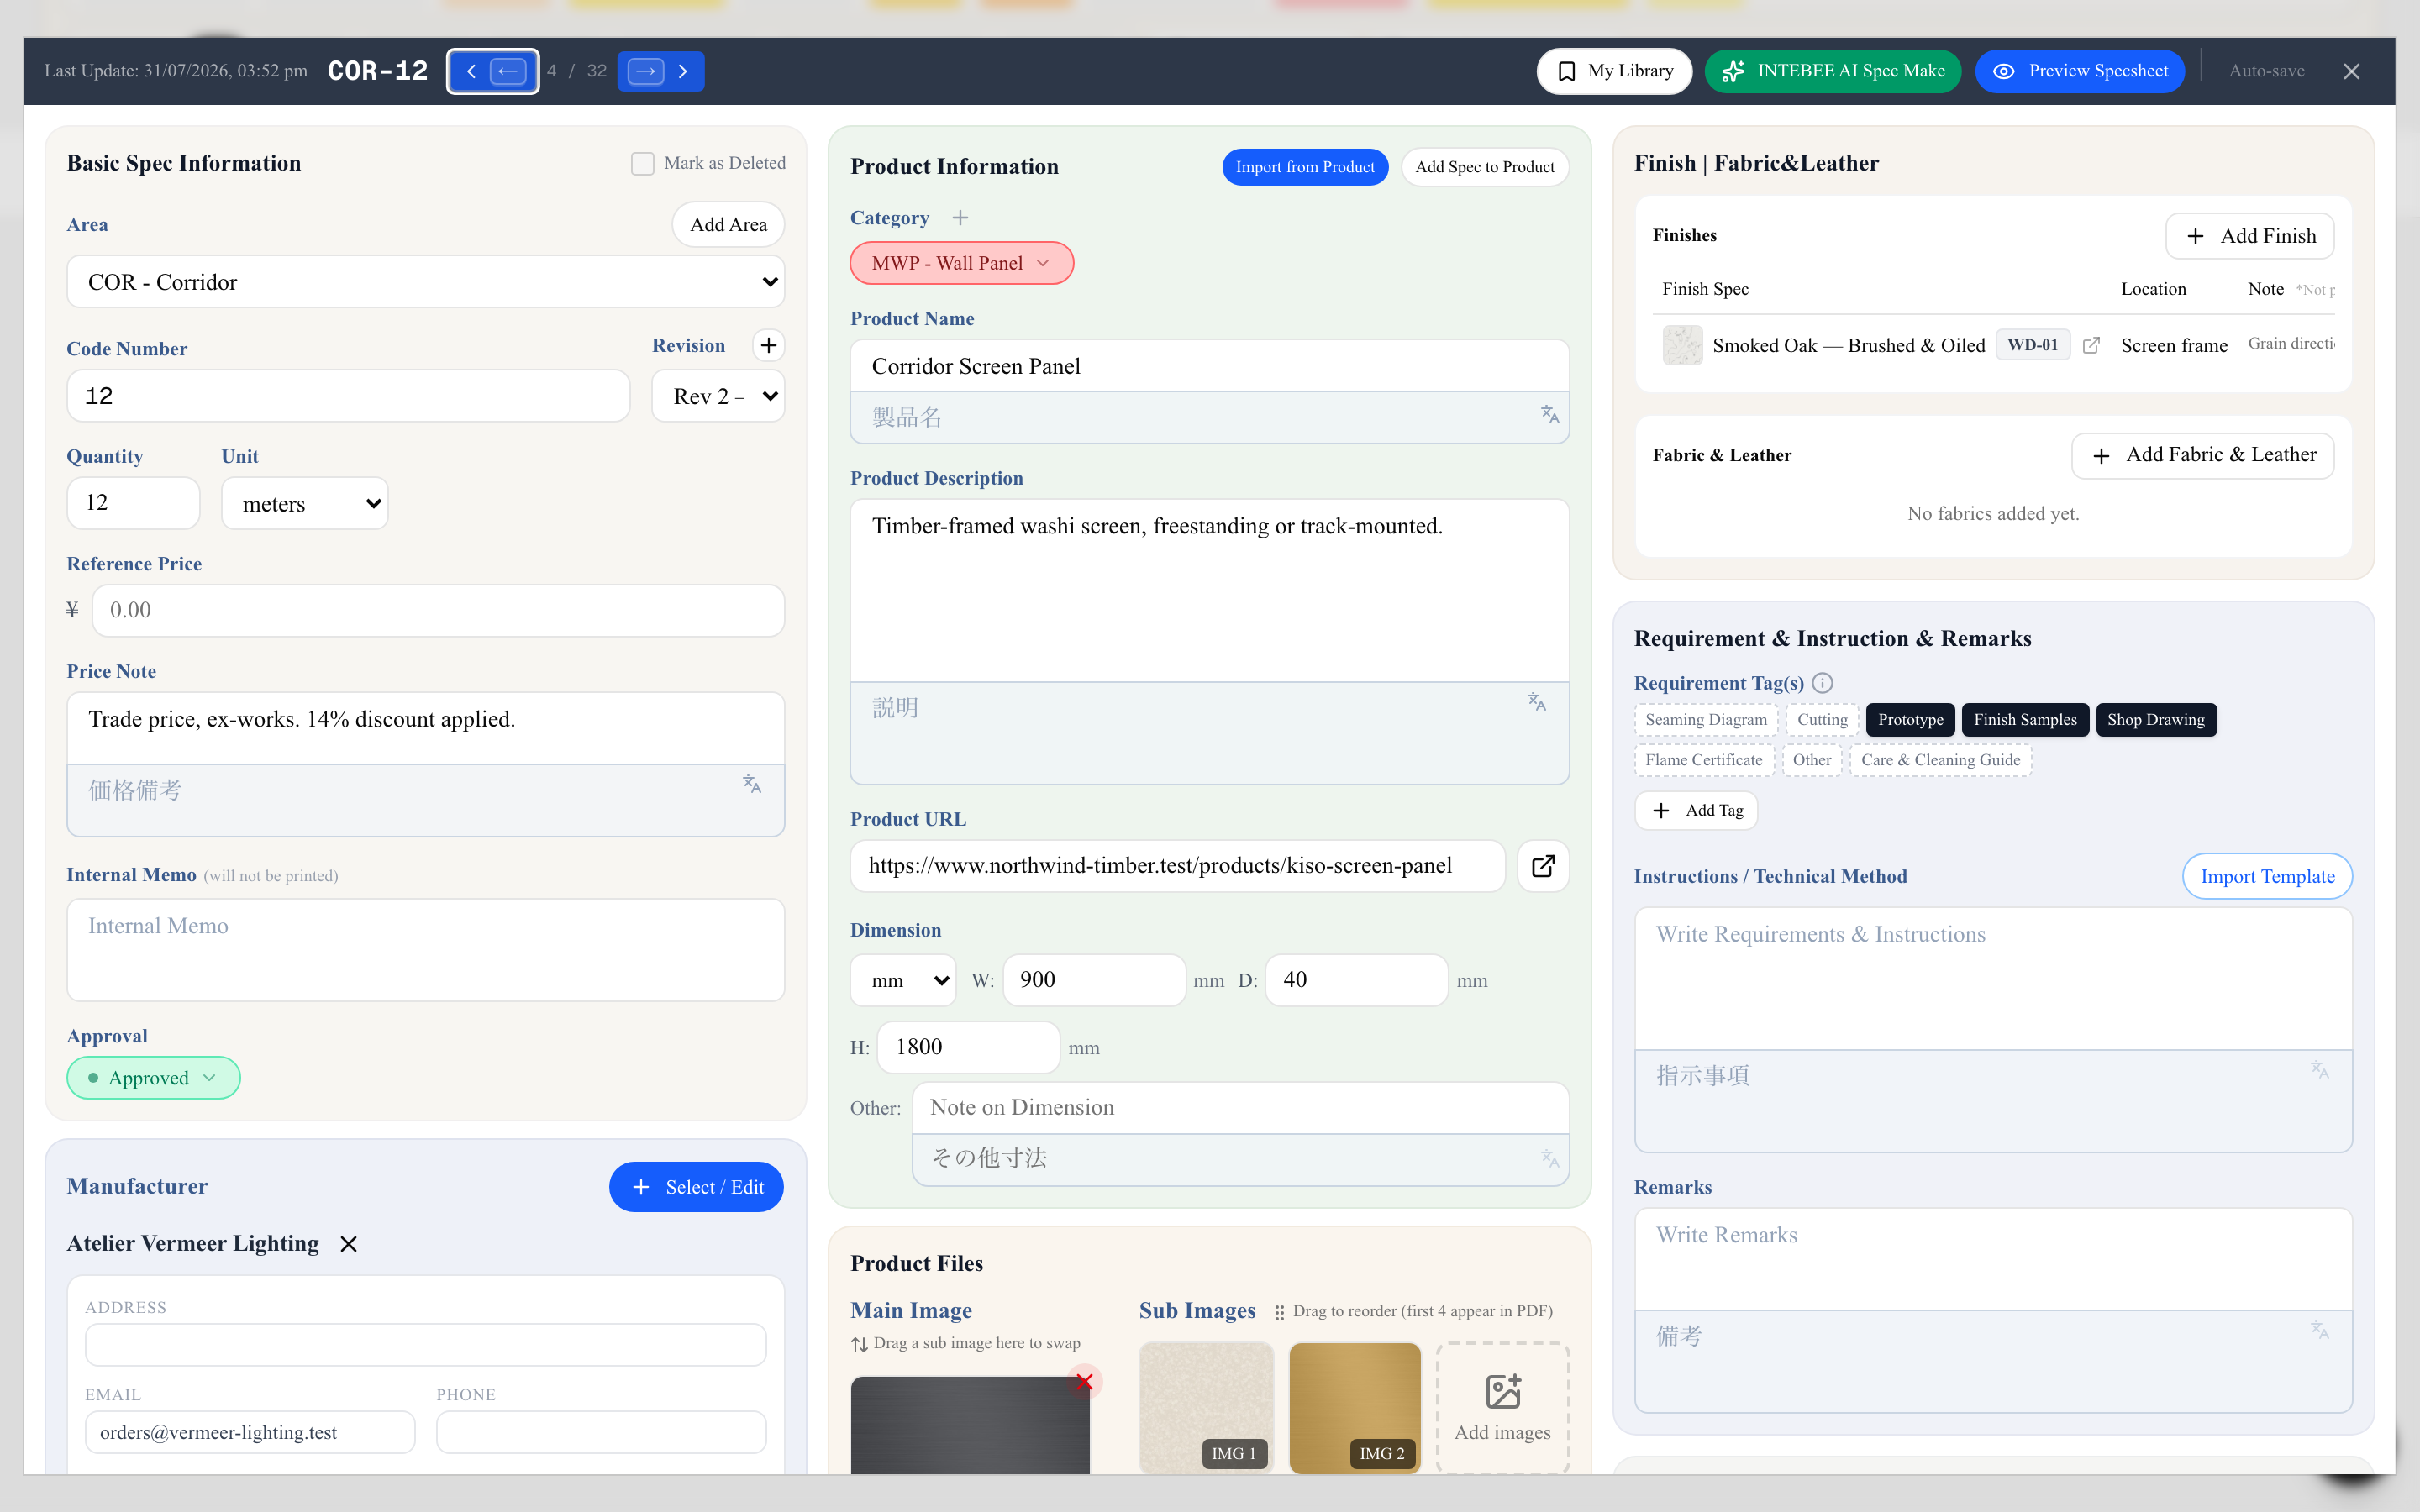
Full details in Finishes, fabrics & leather.
Price, product link and saving
- Reference Price takes digits and one decimal point and keeps what you type while the box is active (0.5 stays 0.5); it is shown with thousand separators (1,234.56) once you leave it. A price can't be negative — a minus sign is refused with a message. In a JPY project amounts have no decimals (¥1,235), in the list and in print alike.
- Product URL: "example.com/chair" is saved as "https://example.com/chair". Only web links (http:// or https://) are saved and opened; anything else is refused with a message and the previous link is kept.
- Changing what the client approved on an Approved sheet — name, description, main image, area, category, item code, quantity, price, dimensions, manufacturer, source or product URL — sets its status back to Pending, and a message says it needs approving again. A sheet becomes Approved only when someone picks that status.
- If the sheet is moved to the Trash in another window while it is open here, your next edit is not saved: a message says so and the sheet turns view-only. Restore it from the Trash to edit it again.
- Opening a sheet and closing it — or paging on with the arrows — without changing anything saves nothing, so an approved sheet stays approved.
- If your session runs out while the sheet is open, the header says Session expired and a banner offers Sign in again (which brings you back to this sheet) and Retry save; your edits stay in the window until you close it.
- If the connection drops, the header says Offline and a banner says You're offline. Your changes stay in this window and are saved automatically when the connection is back. No sign-in is needed: the save runs again by itself once you are back online.
- A sheet that has a Product Name cannot be saved without one. If you empty the name, the previous name is kept and the field says Enter a product name. An empty name is not saved — the previous name is kept. A new sheet can stay unnamed until you type a name.
- A Product Name can be up to 200 characters; a counter appears near the limit. A longer name is not saved — the sheet keeps its previous name — and Close first asks: Keep editing to shorten it, or Close and keep the previous name.
- Images over 20MB, empty (0-byte) files and iPhone HEIC photos are refused with a message naming the file — save HEIC photos as JPG or PNG first.
Images
- Set one main image (large on the printed sheet) and optional sub images (details, dimensions drawings, colorways).
- Upload images up to 20MB — INTEBEE compresses them automatically for fast loading while keeping print quality.
- With AI Spec Make, image candidates are found and filtered for relevance automatically; you choose which to keep.
Rich text
Long-form fields (description, notes, instructions) support inline formatting — bold, italics, underline, color, and highlights — via the bubble toolbar that appears when you select text.
Second language
If your project has a second language enabled, every text field has a paired second-language field, and the printed document can show both languages together. A second language on spec sheets is a Studio plan feature.
- Type translations manually, or
- Use the translate button beside a single field — those are free — or
- Translate All in the header, which fills every empty second-language field on the sheet in one pass for 1 AI credit. It never touches a field you already translated or typed by hand, so pressing it again only fills what you have added since.
Requirement tags
In the third column, Requirement Tag(s) records what you need the maker to submit for this item — a shop drawing, finish samples, a prototype, a flame certificate. Click a chip to select it; selected chips print solid on the sheet and unselected ones print dashed, so the reader sees the whole checklist.
Full details, including the built-in seven and translated tag names, in Requirement Tags.
Instructions
Instructions / Technical Method sits under the requirement tags. Import Template pulls in one of your team's saved instruction templates — installation notes, care instructions, compliance text — so standard wording is never retyped per sheet, and the icon beside it saves the text you have just written back as a new team template. The templates themselves are managed in Settings → Templates.