
Requirement Tags
Tell the maker what you need submitted for this item — shop drawings, samples, prototypes, certificates.
A spec sheet says what the item is. Requirement tags say what you need back before it can be made: a shop drawing to check, a fabric sample to sign off, a flame certificate for the file.
They are the short checklist that turns a specification into an instruction to a supplier — and they print on the sheet, so the checklist travels with the document instead of living in an e-mail thread.
The built-in seven
Every workspace starts with the seven submittals that come up on almost every FF&E package. They are created automatically the first time anyone opens a spec sheet editor.
| Tag | What you are asking the maker for |
|---|---|
| Seaming Diagram | A drawing showing where the seams fall on an upholstered piece — panel layout, seam lines, welt and stitch positions. |
| Cutting | Confirmation of how the upholstery fabric is cut — cutting layout, nap and pattern direction, pattern match across panels. |
| Prototype | A full prototype of the item for review and sign-off before the production run. |
| Finish Samples | Physical samples of the finishes and materials — timber, metal, stone, paint — for approval against the specification. |
| Shop Drawing | The maker's own fabrication drawing (also called a production or workshop drawing), showing how the piece will actually be built. |
| Flame Certificate | Documentary proof that the material meets the required flammability standard for the project. |
| Other | Anything the six above do not cover — pair it with a note in Instructions / Technical Method. |
The seven are a starting point, not a fixed list. Nothing stops you deleting one you never use or adding your own.
Choosing tags on a spec sheet
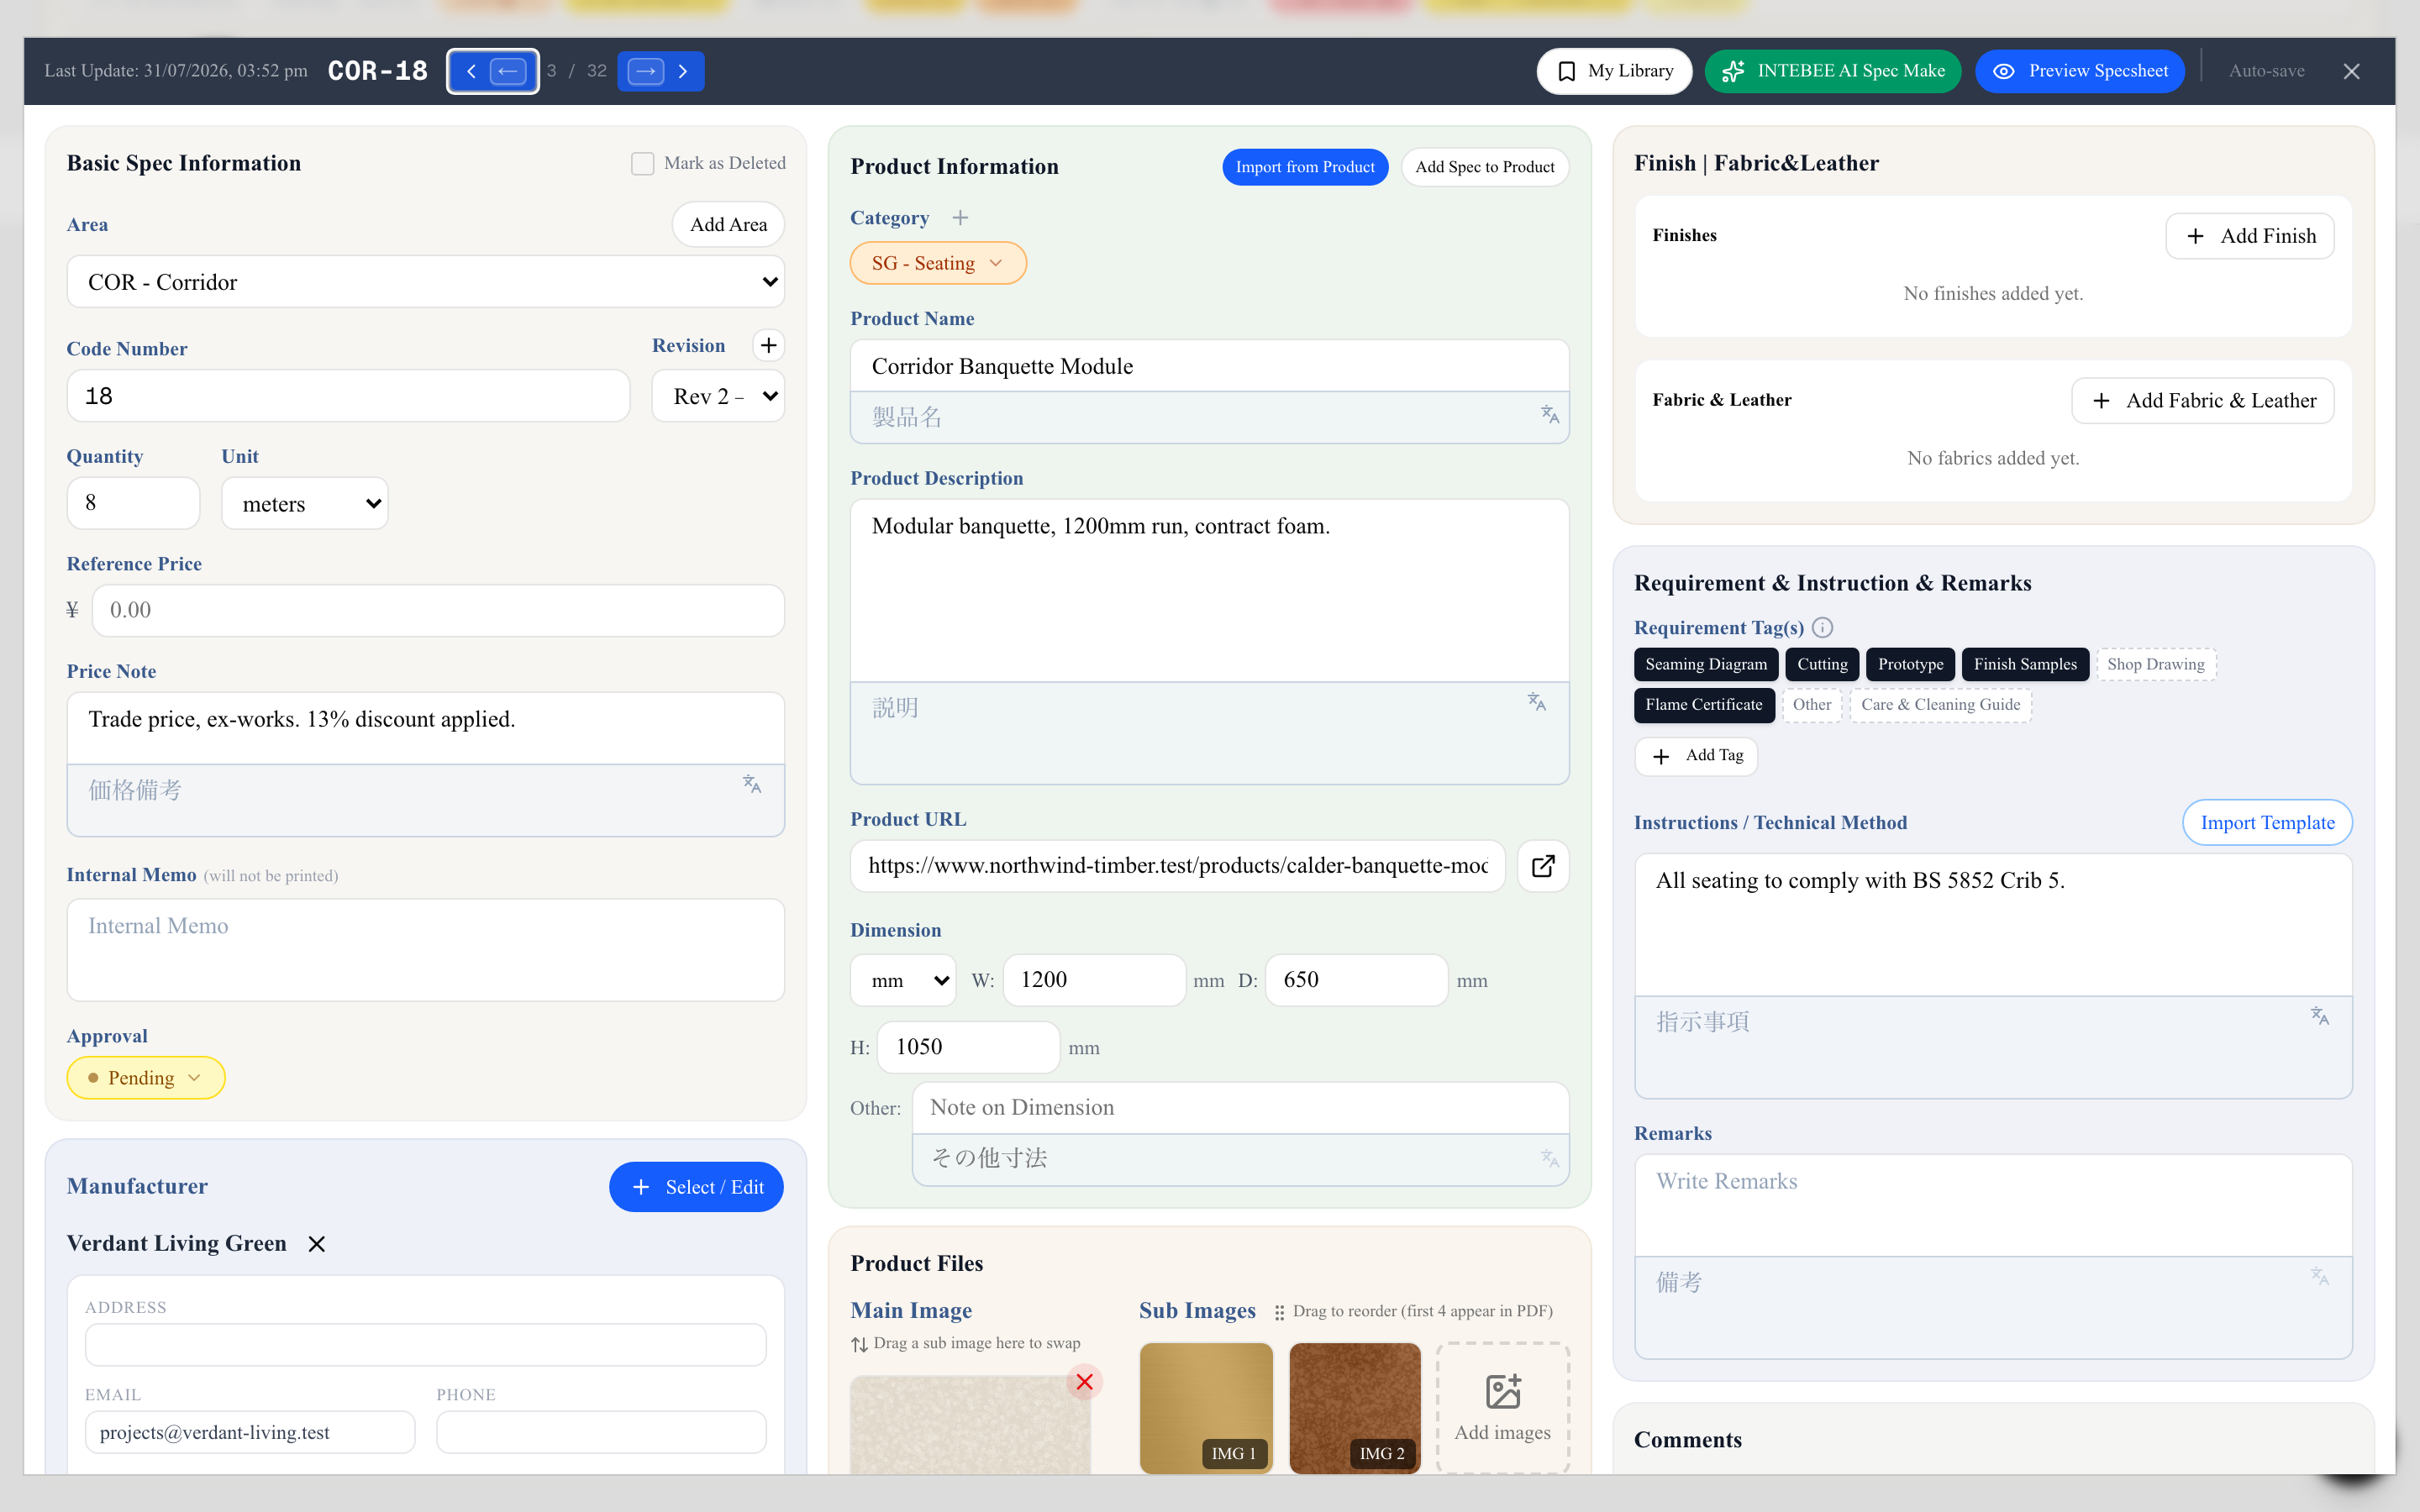
The Requirement Tag(s) chips sit in the right-hand column of the spec sheet editor, in the Requirement & Instruction & Remarks panel.
- Click a chip to select it, click again to clear it. Every tag in the workspace is shown — selected chips are solid, unselected chips stay dashed and pale, so you can see the full checklist and what has been ticked at a glance.
- The change is saved as soon as you click. There is no separate save step.
- Need something that is not in the list? Click Add Tag, type the name, press Add. The new tag is created for the whole workspace, not just this sheet — so the next person specifying a similar item finds it already there.
Tags pair naturally with the Instructions / Technical Method field just below them: the tag says what you need, the instruction says how it should be done.
Managing the list for the whole team
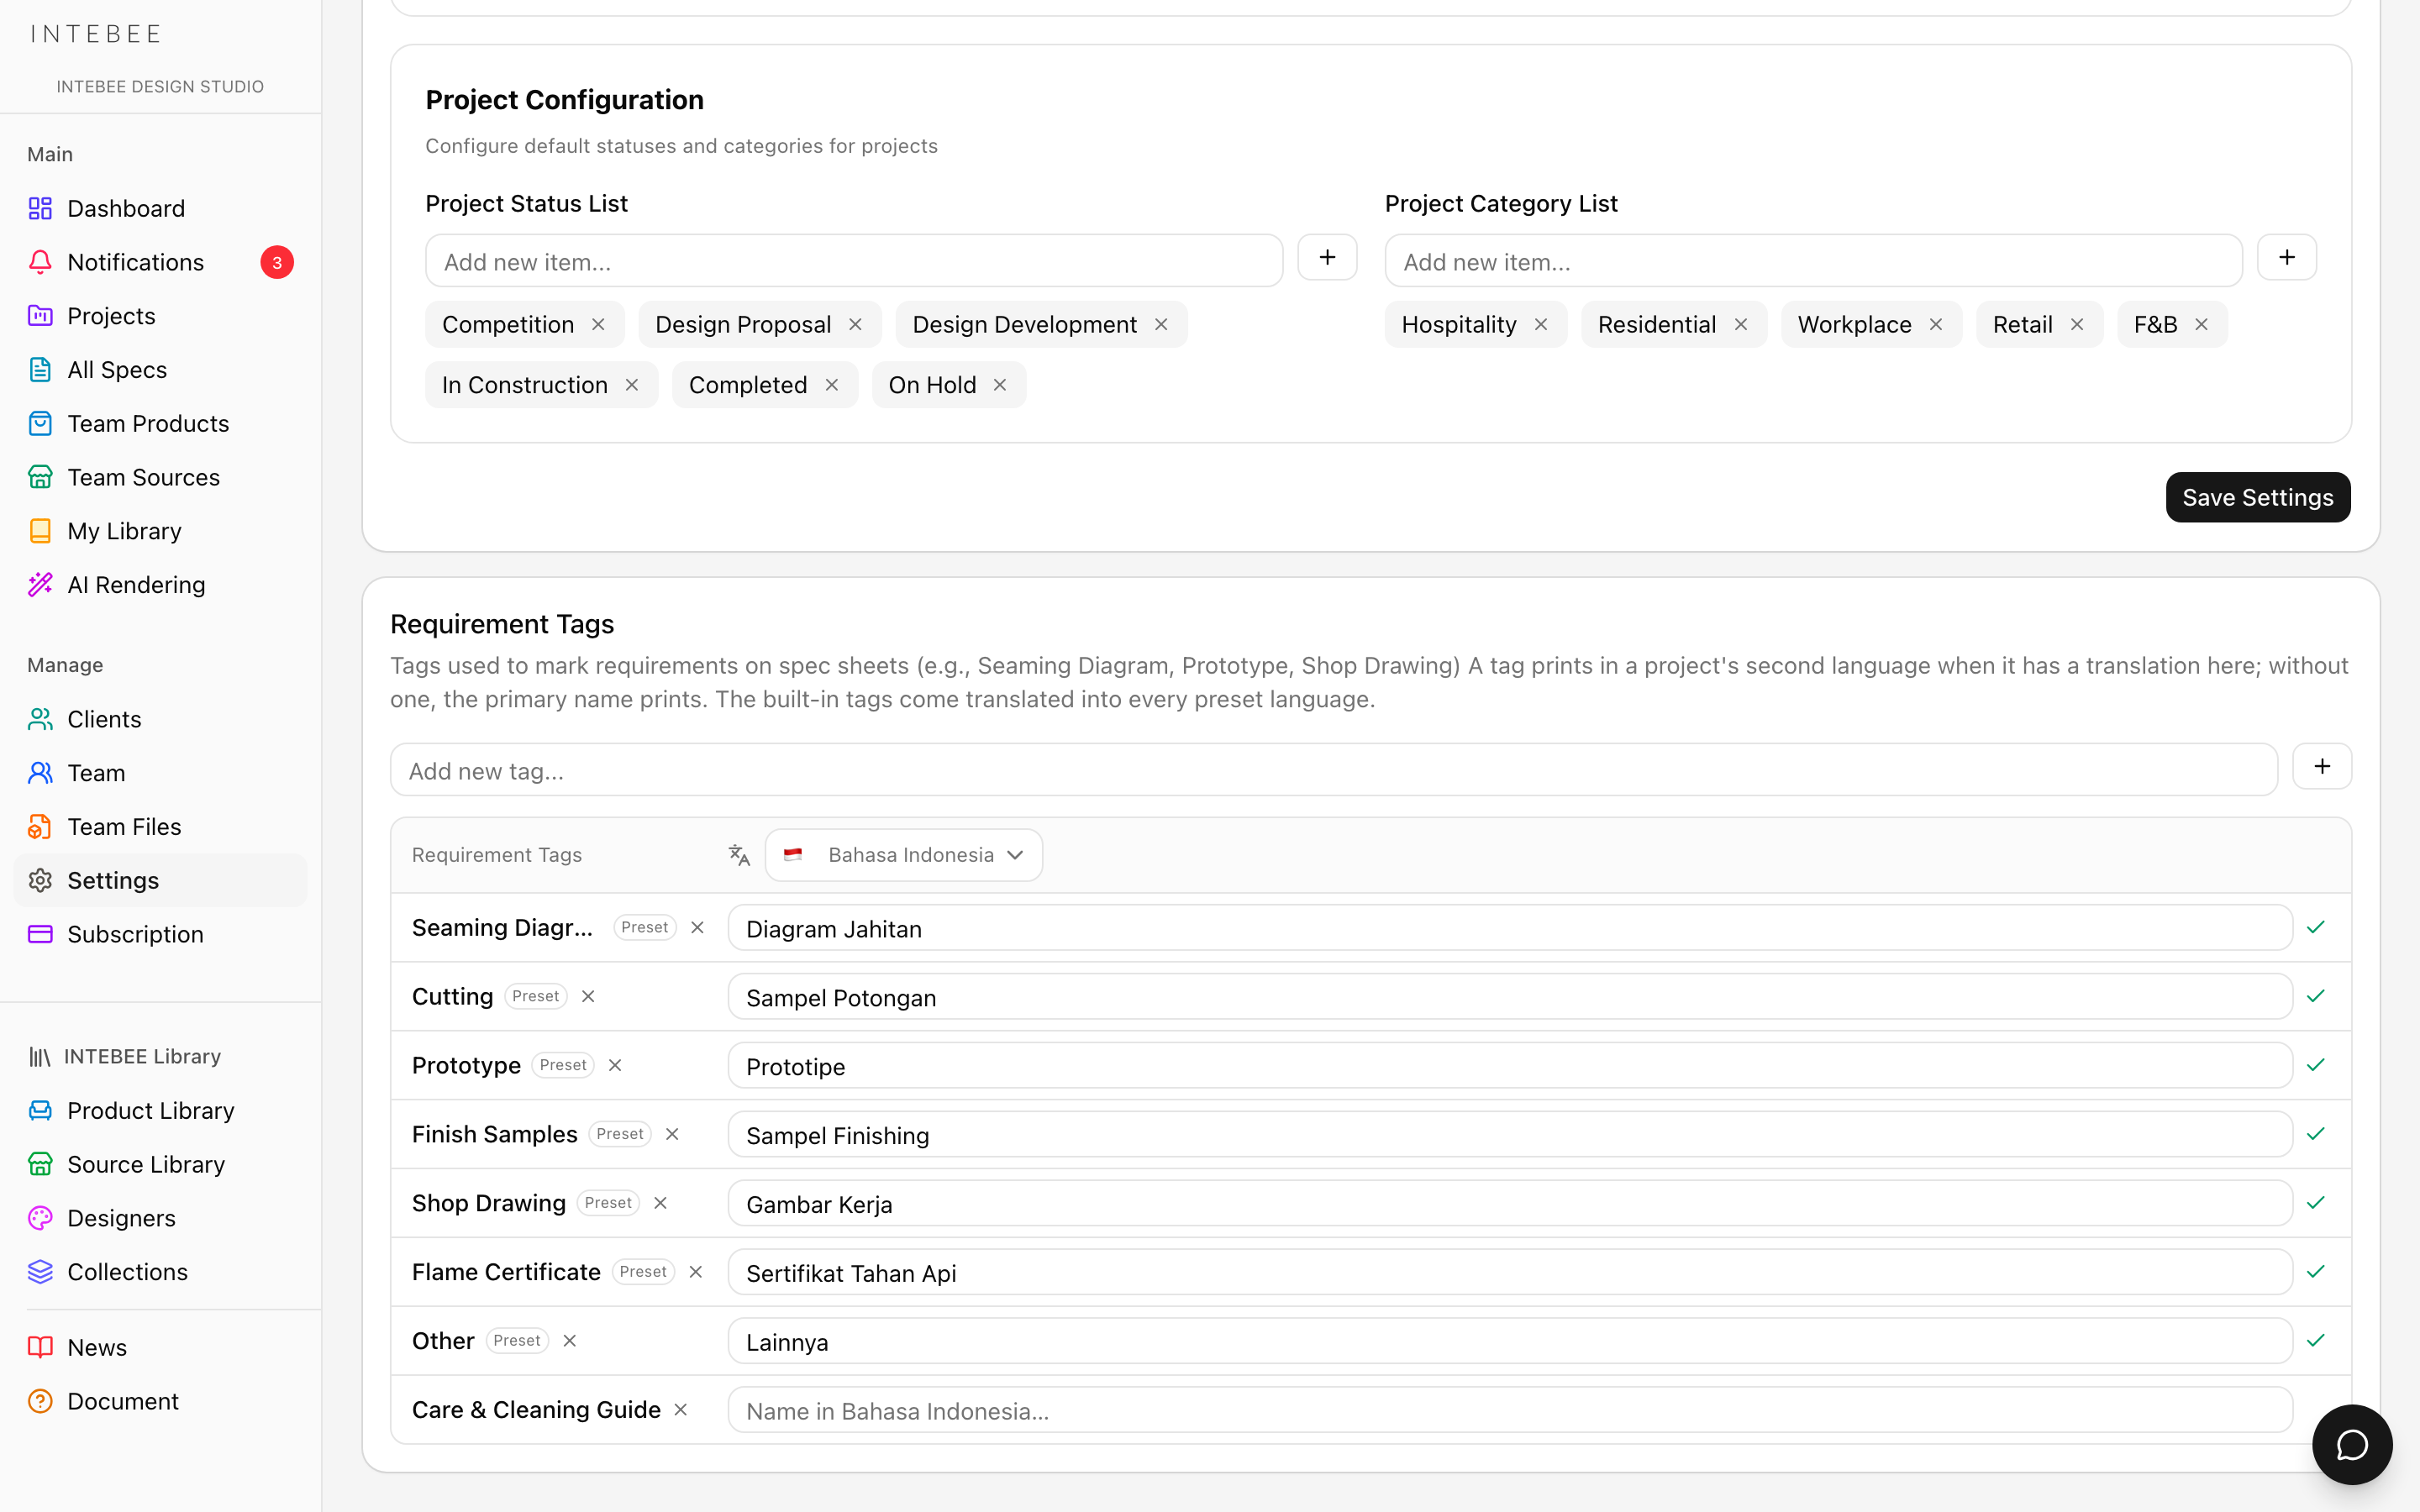
Because tags are workspace-wide, the master list lives in the Requirement Tags card on Settings → General (sidebar → Manage → Settings).
From here you can:
- Add a tag — type it into Add new tag… and press the + button (or Enter). Same list, same effect as adding one from the spec sheet editor.
- Remove a tag — the × beside its name. INTEBEE first tells you how many spec sheets use the tag; removing it takes it off every one of them (it no longer prints under Required Item) and deletes its translations. This cannot be undone, so retire tags deliberately.
- Translate a tag — the column beside the names; see below.
The seven built-in tags are badged Preset. Tags appear in the order they were created, and new tags are added to the end of the list. That order is the order they appear both in the editor and on the printed sheet, so it is worth adding the tags you use most first.
Only workspace admins and managers can change the master list here. Any member can still add a tag from the spec sheet editor while they work.
Translated tag names
If your documents go out in a second language, each tag can carry a translated name.
The card is a table: your tags down the left, and one language selector at the top of the right-hand column. Pick a language there and every tag's name in that language is editable inline — type it and press Enter, or just click away; each row saves on its own and shows a tick when it is stored. Escape abandons what you were typing. The language dropdown counts how far you have got (5/7), so you can see at a glance which languages are finished.
The primary name stays the identity of the tag — translations are labels laid over it, so translating a tag never breaks the spec sheets that use it. A tag with no translation in a language simply prints its primary name.
In the spec sheet editor, a project with a second language also lets you type the second-language name at the moment you add a new tag, so you do not have to come back here for it.
How tags print
Requirement tags print on the full spec sheet layout as a Required Item row, in the section with instructions and remarks. (The compact list/schedule layouts do not include it.) By default the row prints even when no tag is ticked — all seven built-in tags faded, the way the original sheet did — and text in Instructions alone never opens it. A team or project that would rather leave a blank row out turns off Show when empty for Required Items in the export dialog's Config popover (see Print Templates & PDF Export).
- Selected tags print solid black. Unselected tags print dashed and light grey.
- Both are printed on purpose: the reader sees the complete checklist and can tell instantly that, say, a prototype is required but a seaming diagram is not — rather than guessing whether an absent item was omitted or simply not needed.
- With Show when empty off, the row appears only when at least one tag is ticked; text in Instructions / Technical Method alone never opens it.
On second-language documents
When a project has a second language set and you export with Second Only, the tags print using the translated names you entered on Settings → General. Any tag without a translation for that language falls back to its English name, so nothing ever prints blank.
Primary Language prints the English names. Show Both prints the English name with the translation underneath it.
If you translate nothing else, translate these seven — they are the part of the sheet the workshop reads first.
Related
- Editing Spec Sheet Fields — the rest of the editor's right-hand column
- Instruction Templates — reusable text to pair with a tag
- Print Templates and PDF Export — where language mode is chosen
- Language Settings & Multilingual Documents — setting up a second language