Print Templates and PDF Export
The Export dialog — views, layouts, sort, language, cover, TOC, dividers, and Word/Excel/CSV.
INTEBEE renders your spec sheets into professional documents server-side — no design software needed. It all happens in one place: the Export dialog.
Opening the dialog
Open a project and click Export in the header. The dialog is titled Export Spec Sheets and shows next to the title how many sheets it is about to render.
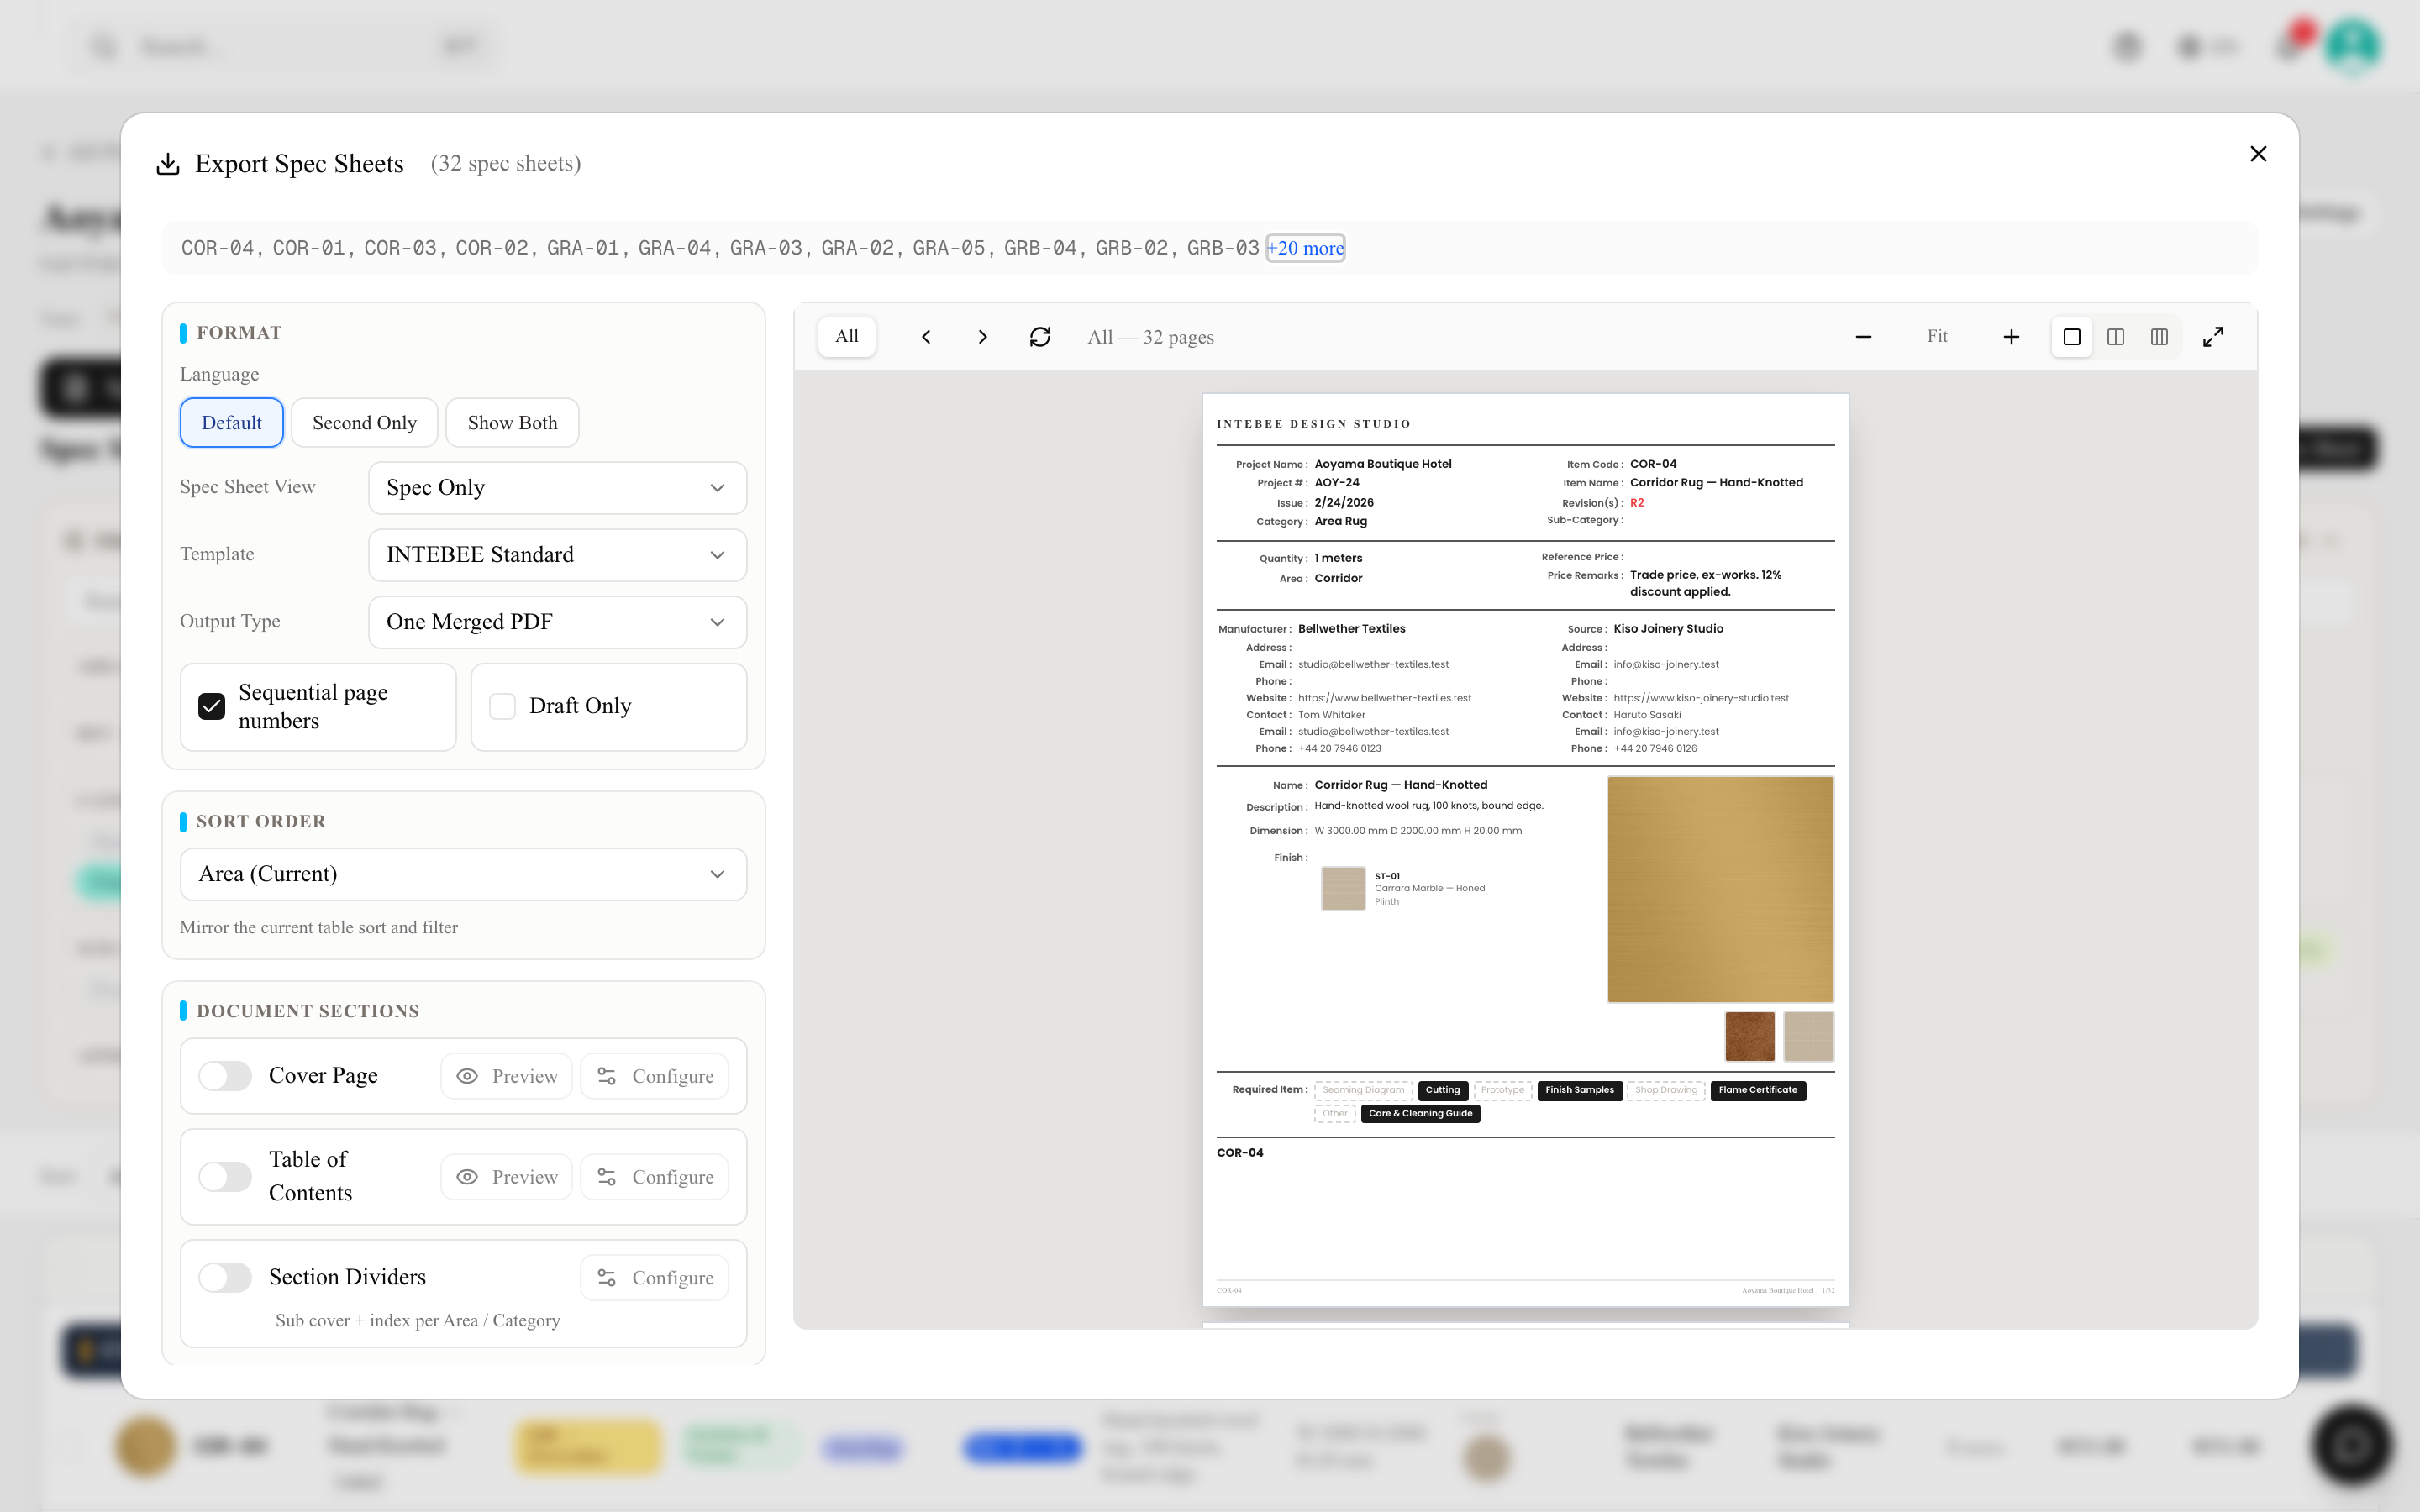
The dialog does not pick the sheets — the list behind it does. Filter or select rows in the Spec Sheets tab first, then click Export. The item codes going into the document are listed across the top of the dialog, so you can check the scope before you generate. Export with nothing selected and you get everything currently in the list. When rows are checked, the Export button shows how many (for example Export (3)), the selection bar above the list carries its own Export button, and the dialog says it is exporting only the selected sheets — clear the selection to export them all. The sheets keep the list's order.
Your choices are saved on the project, not on your account. Everyone on the team opens the dialog with the same setup, and a change one member makes shows up live for the others. What a new export starts from is set team-wide in Settings → Templates → Export Layouts — those values carry a Default badge in the dialog, and a project that has saved its own choices keeps them.
Format
The Format card holds everything about how a sheet looks.
Language — Primary Language, Second Only or Show Both. It only appears when the project actually has a second language, since without one every option but the first prints nothing. Show Both prints both languages together; 2nd Language Size (Default / Large) then controls how large the second language prints, and appears only on Show Both. See Language settings.
Spec Sheet View — how much of each sheet reaches the document. Each option carries an icon, in this menu and in the Template menu:
| View | What you get |
|---|---|
| Spec Only | The standard one-page spec sheet. |
| Spec + Finish | Plus a full page for every linked Finish and Fabric & Leather spec. See Finishes, fabrics & leather. |
| Spec + Document | Plus the documents attached to the sheet. |
| Spec + Finish + Document | Everything. |
| List | Many sheets per page — then pick a List Type. |
List Type appears when you choose List:
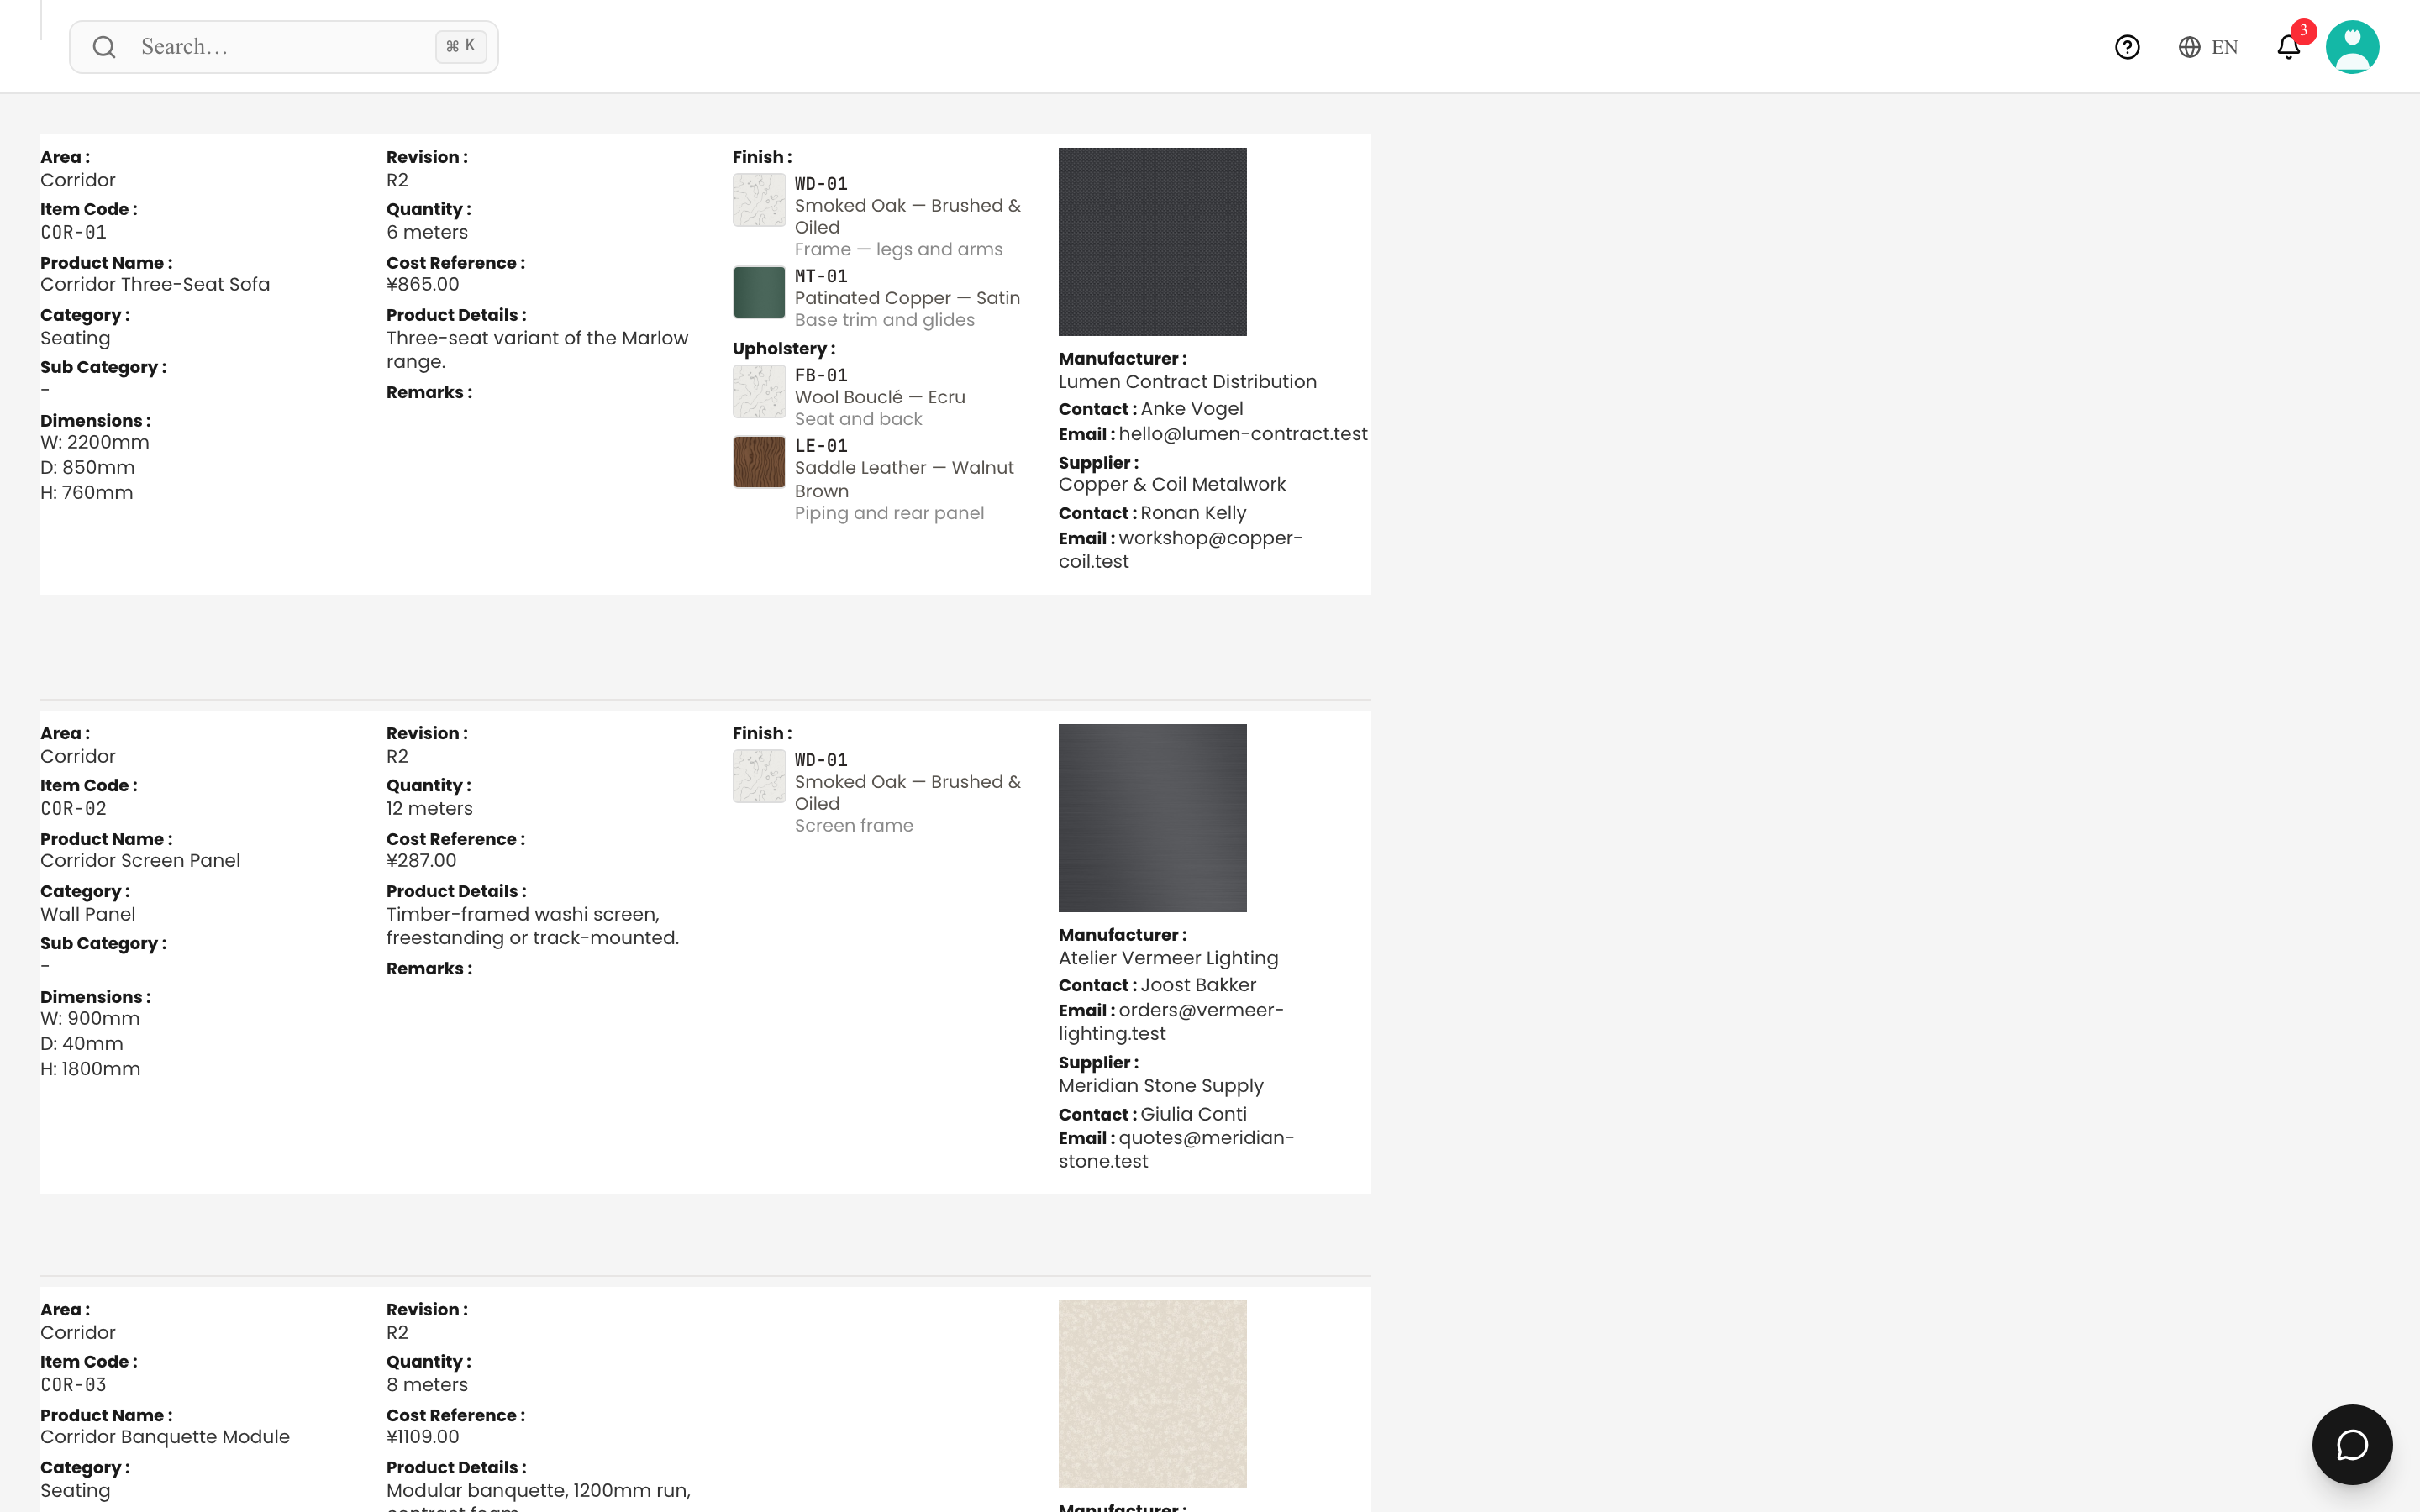
- Schedule — many specs per page; pick the layout in View Setting. A Fields popover decides whether each spec's Instructions and Remarks print, or whether the schedule stays compact.
- Index — one row per sheet: code, area, category, supplier and a thumbnail.
- Status — status, note, price and contacts per row: the purchase agent's sheet. A Columns popover picks which of those columns appear.
View Setting appears on Schedule. It holds both the schedule densities and the alternative multi-item layouts:
- Standard (3 items/page), 4 items/page, 5 items/page, Compact (6 items/page), Minimal (8 items/page) — the maximum number of schedule blocks on a page. A long block moves whole to the next page, so a page can carry fewer than the number you pick.
- Moodboard — product images with material swatches.
- Card — image cards with key metadata.
- Grid — compact image tiles.
- Vertical — a transposed table, one column per spec, printed landscape.
The multi-item layouts also offer Dividers (like the table view): Area dividers and Category dividers insert a heading whenever the run changes area or category.
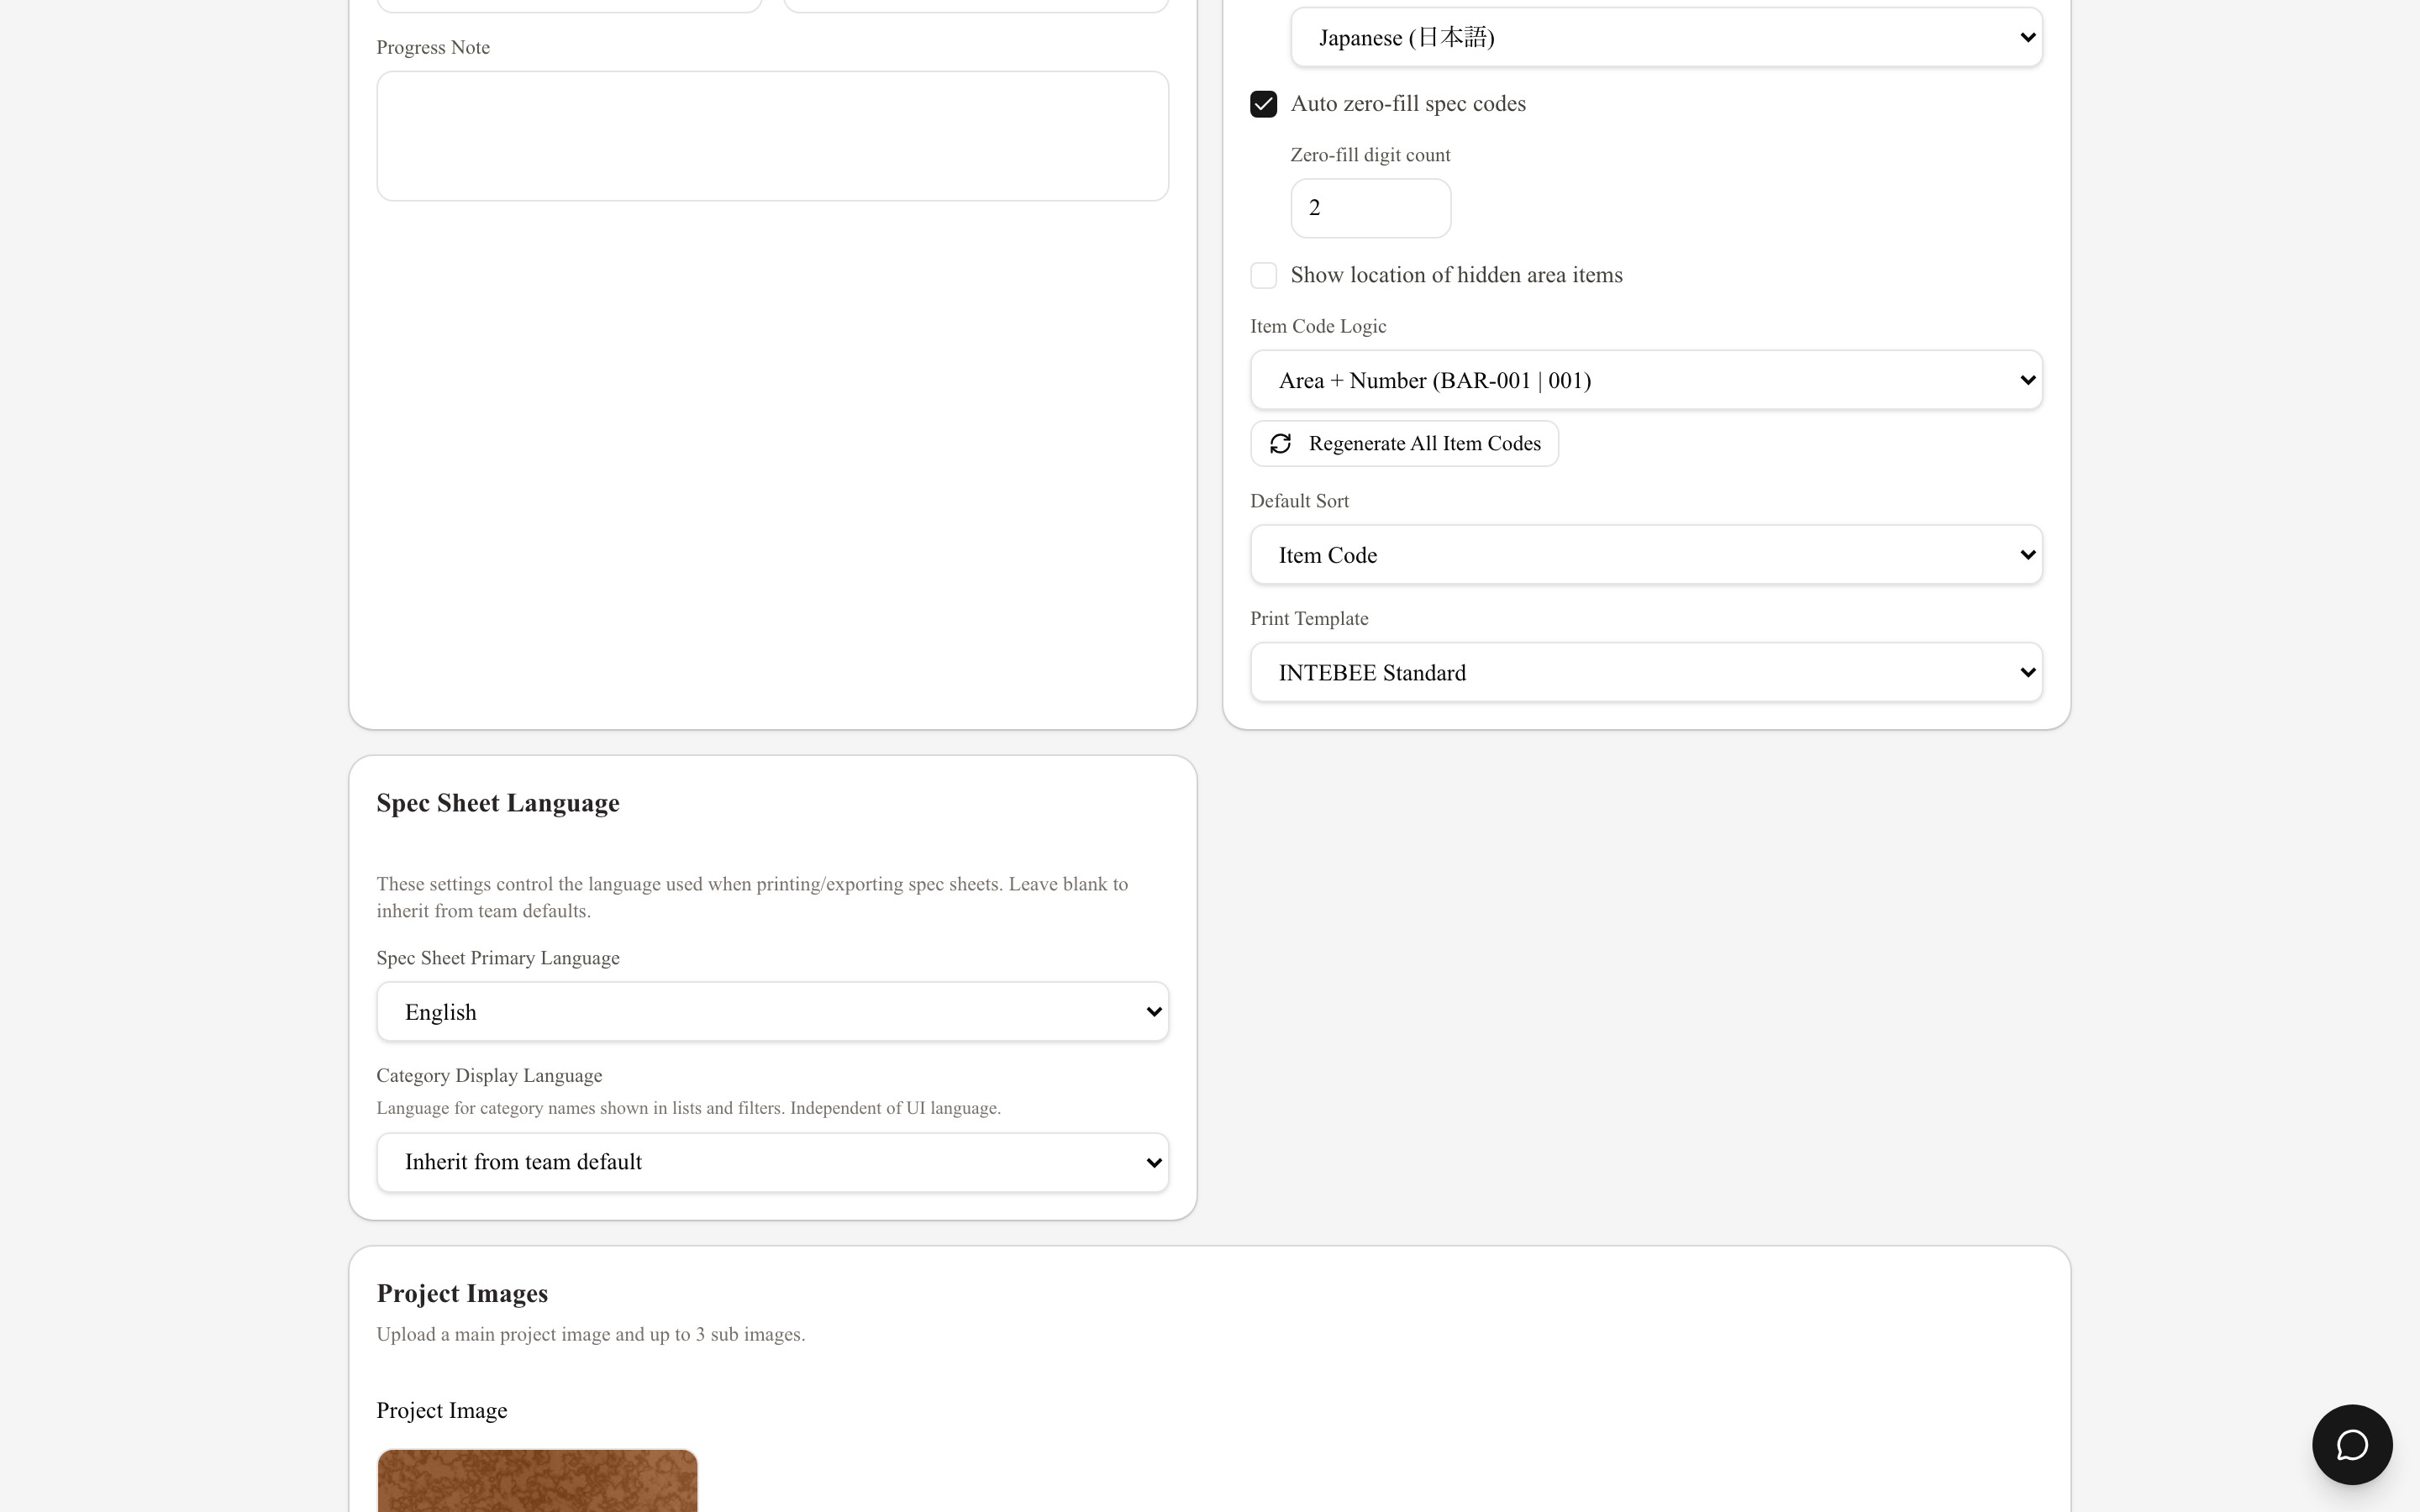
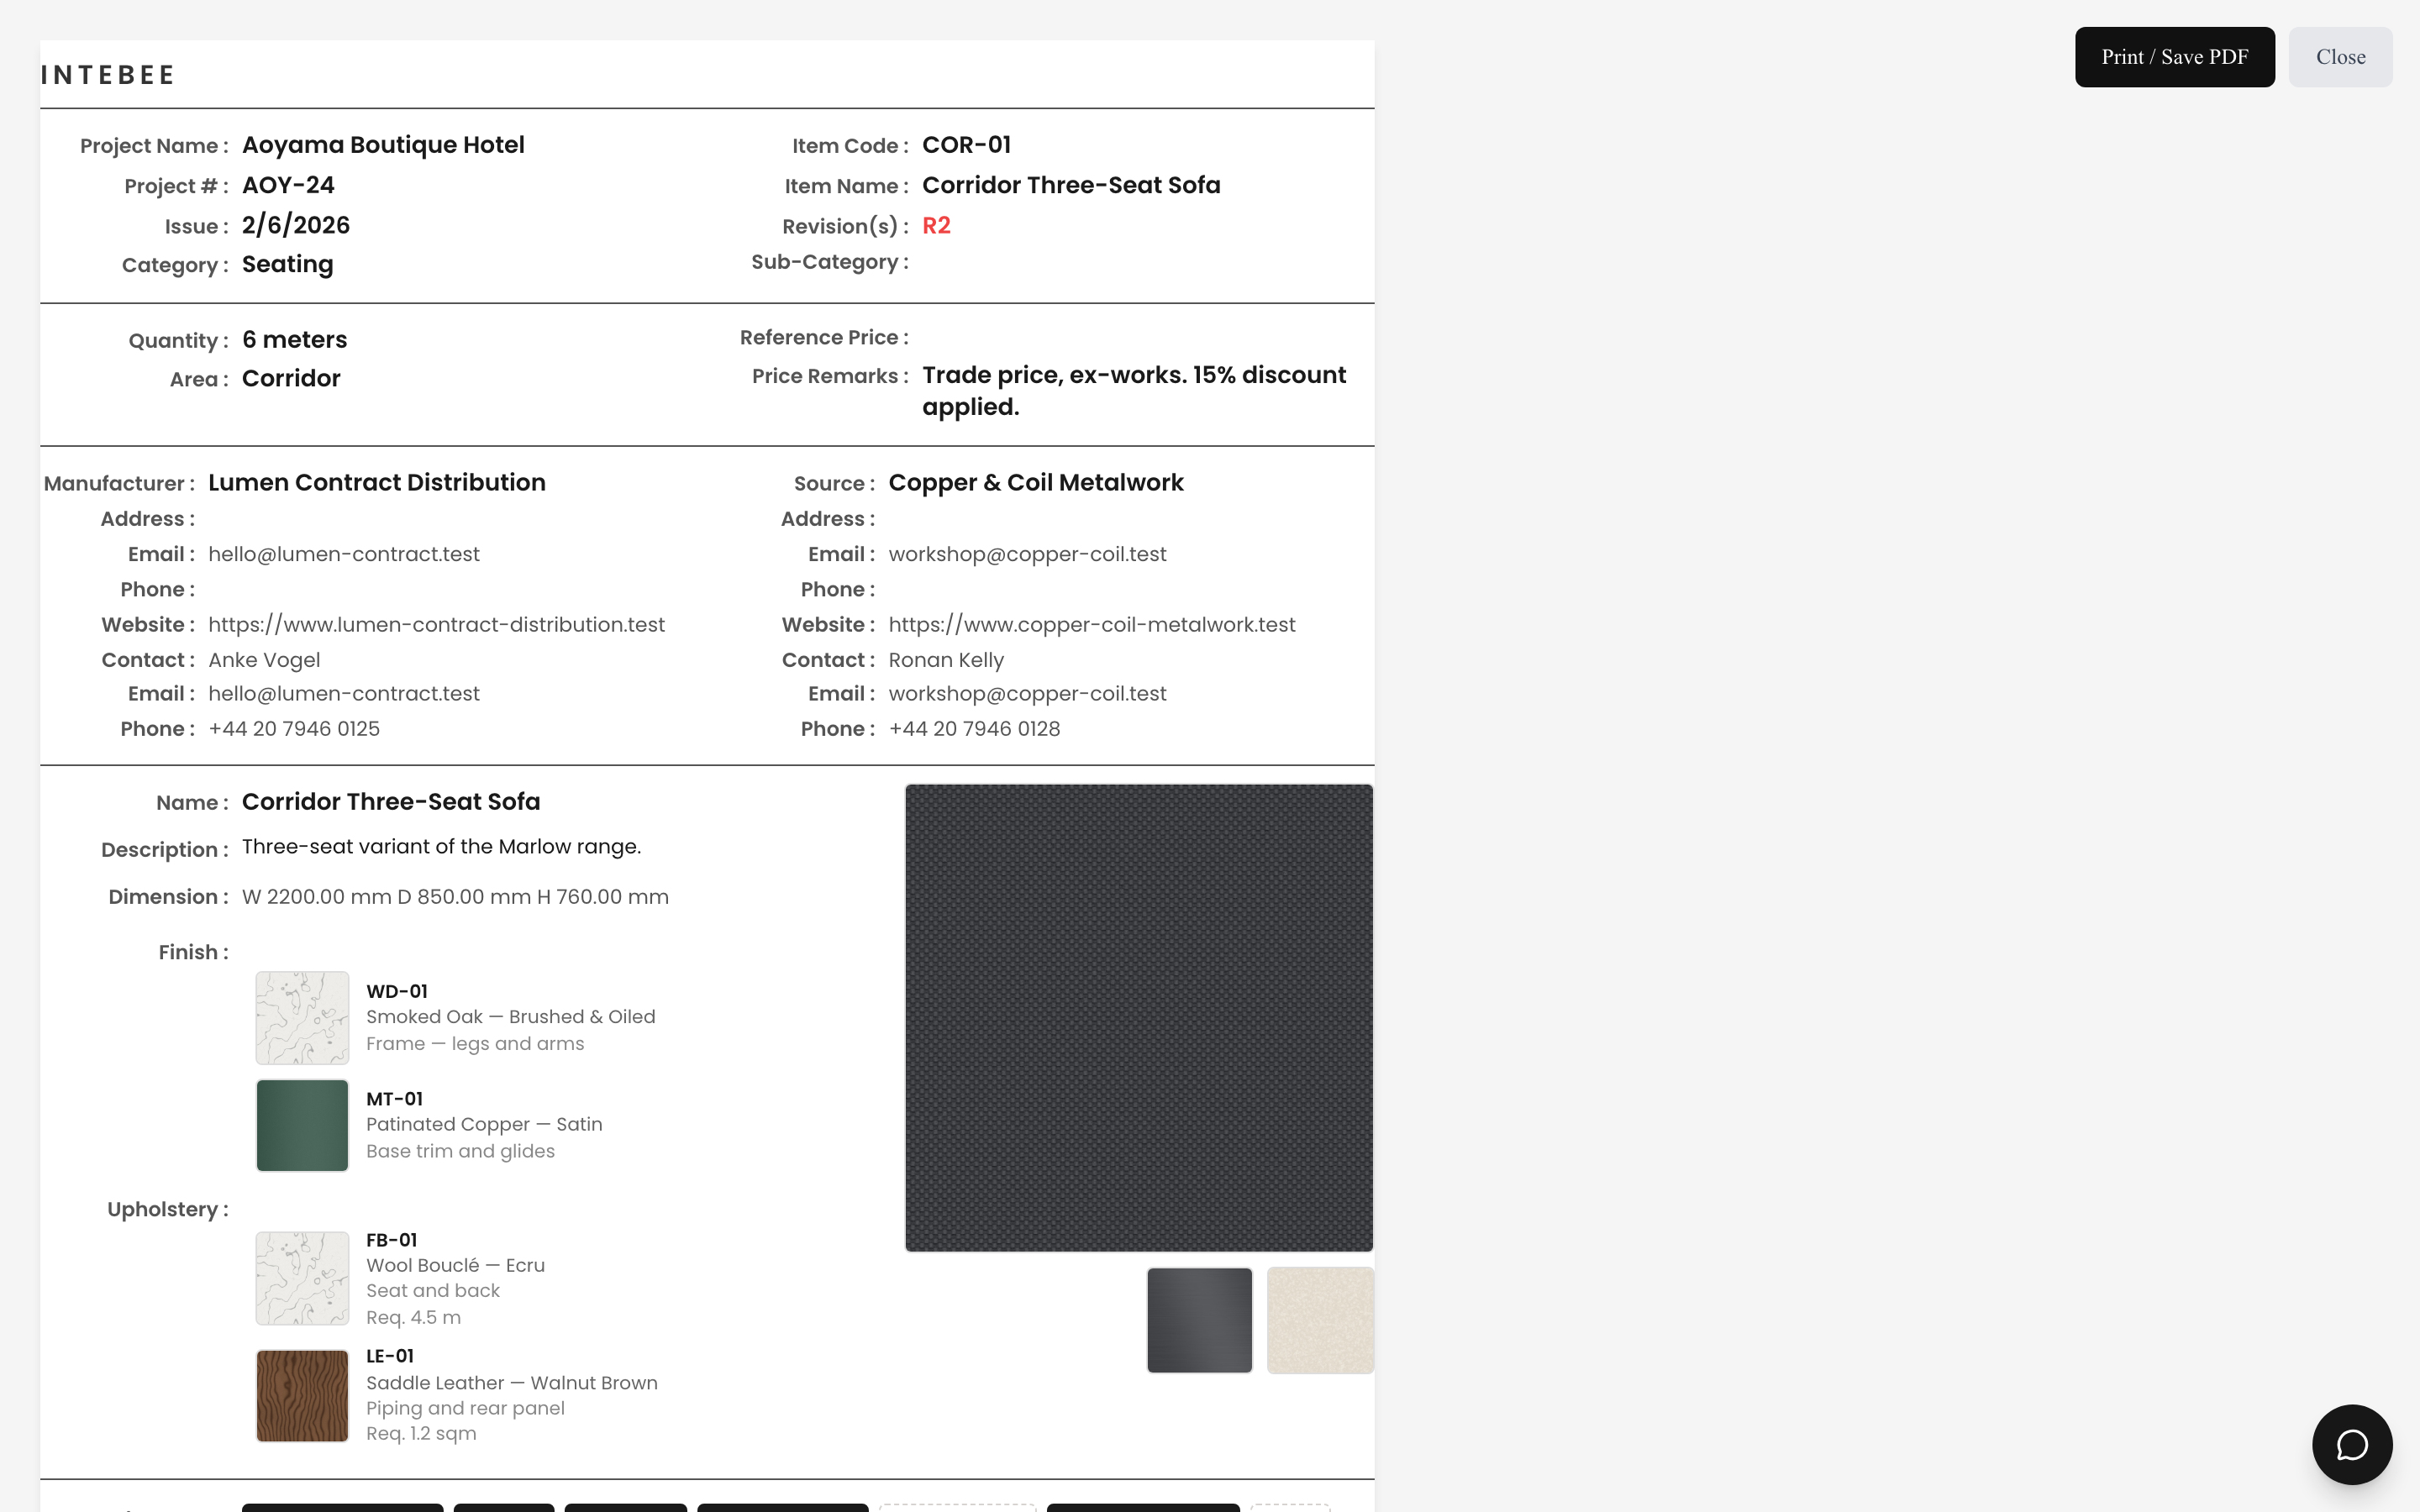
Template — INTEBEE Standard or Large Image. Templates shape the one-sheet-per-page layouts, so the control is disabled on the List views, which bring their own layout. On Large Image, two more controls appear: Image Position (Left / Center / Right) and Image Size (Small / Medium / Large). The team default for all three is in Settings → Templates → Export Layouts; a project also has its own Print Template in Project Settings → Code Settings, and you can still override it here at export time.
A project whose Print Template is Large Image (Left Align) opens the export on Large Image with Image Position set to Left, even when the team's default position is different.
Config — the gear button beside Template opens Sheet Layout & Fields, which shapes the one-sheet-per-page layouts (INTEBEE Standard and Large Image):
- Finish & upholstery layout — Horizontal (the default: the linked Finish and Upholstery blocks sit side by side and wrap across the page width) or Vertical (one under another).
- Printed fields — switches grouped under Header, Product, Sourcing, Materials and Notes. Turn a field off to leave it off the sheet. All on switches everything back on, and Reset to team default (shown when the team has one) returns to the team's setting. Item name and item code always print; internal notes, approval status and files never print on the sheet.
- Show when empty — one switch each for Required Items, Instructions and Remarks, deciding whether the section prints when the sheet has nothing in it. Defaults: Required Items on (all tags print faded when none is ticked), Instructions on (the label prints with an empty body), Remarks off (a blank Remarks section is left out). Turn one off to hide that section on sheets where it is blank; a section switched off under Printed fields never prints, whichever way its switch is set.
Like the rest of the dialog, this is saved with the project, so everyone on the project exports the same sheet. The team default, which new projects start from, is the Spec Sheet Layout & Fields card in Settings → Templates → Export Layouts. Like Template, Config is unavailable on the List views.
Quantity is optional, and a spec sheet without one prints without it. On the spec sheet pages and the Schedule blocks the whole Quantity field is left out — label, value and unit — even with Quantity / Unit switched on under Printed fields. Layouts with a quantity column or row (Table of Contents, the divider mini index, Status, Vertical) keep it and print the cell as empty. Where a line total is printed (Status, Card, Vertical), an empty Quantity counts as 1.
Output Type — One Merged PDF (a single spec book) or Individual PDFs (ZIP) (one file per sheet, zipped). Merging is the only option on the List views and when you export a single sheet.
Attached Documents — shown on the two "+ Document" views. Embed in sheet template scales each document page to fit inside the A4 sheet and keeps the spec footer (landscape pages shrink to fit). Merge as-is merges the original pages untouched, with no footer and no page number. Only PDF attachments are merged — see Attached documents.
Two switches sit at the bottom of the card:
- Sequential page numbers — stamps page numbers bottom-right across the whole export. Raw-merged document pages are counted but not stamped. One sheet has no sequence to number, so this only appears when you are exporting two or more.
- Draft Only — a red DRAFT ONLY badge top-right of every spec sheet, plus a large diagonal watermark on every page. Use it for anything you don't want mistaken for an issued document.
Sort Order
Sort Order decides the order of the sheets inside the merged document. Like page numbers, it only appears when the export holds more than one sheet:
| Option | What it does |
|---|---|
| Table Order | Mirrors the current table sort and filter — the dropdown shows the live sort's name followed by (Current). |
| Code Order | Sorts by Item Code ascending. |
| Area → Category | Groups by Area, then Category, then Code. |
| Category | Groups by Category, then Sub Category. |
| Sub Category | Groups by Sub Category only. |
| Manufacturer | Groups by Manufacturer name. |
| Approval Status | Groups by approval status (Approved / Pending / …). |
The selected sort's meaning is printed under the dropdown, so you never have to open it to remember what Table Order means.
Document Sections
Three optional parts of the book, each with its own switch and its own Configure popover.
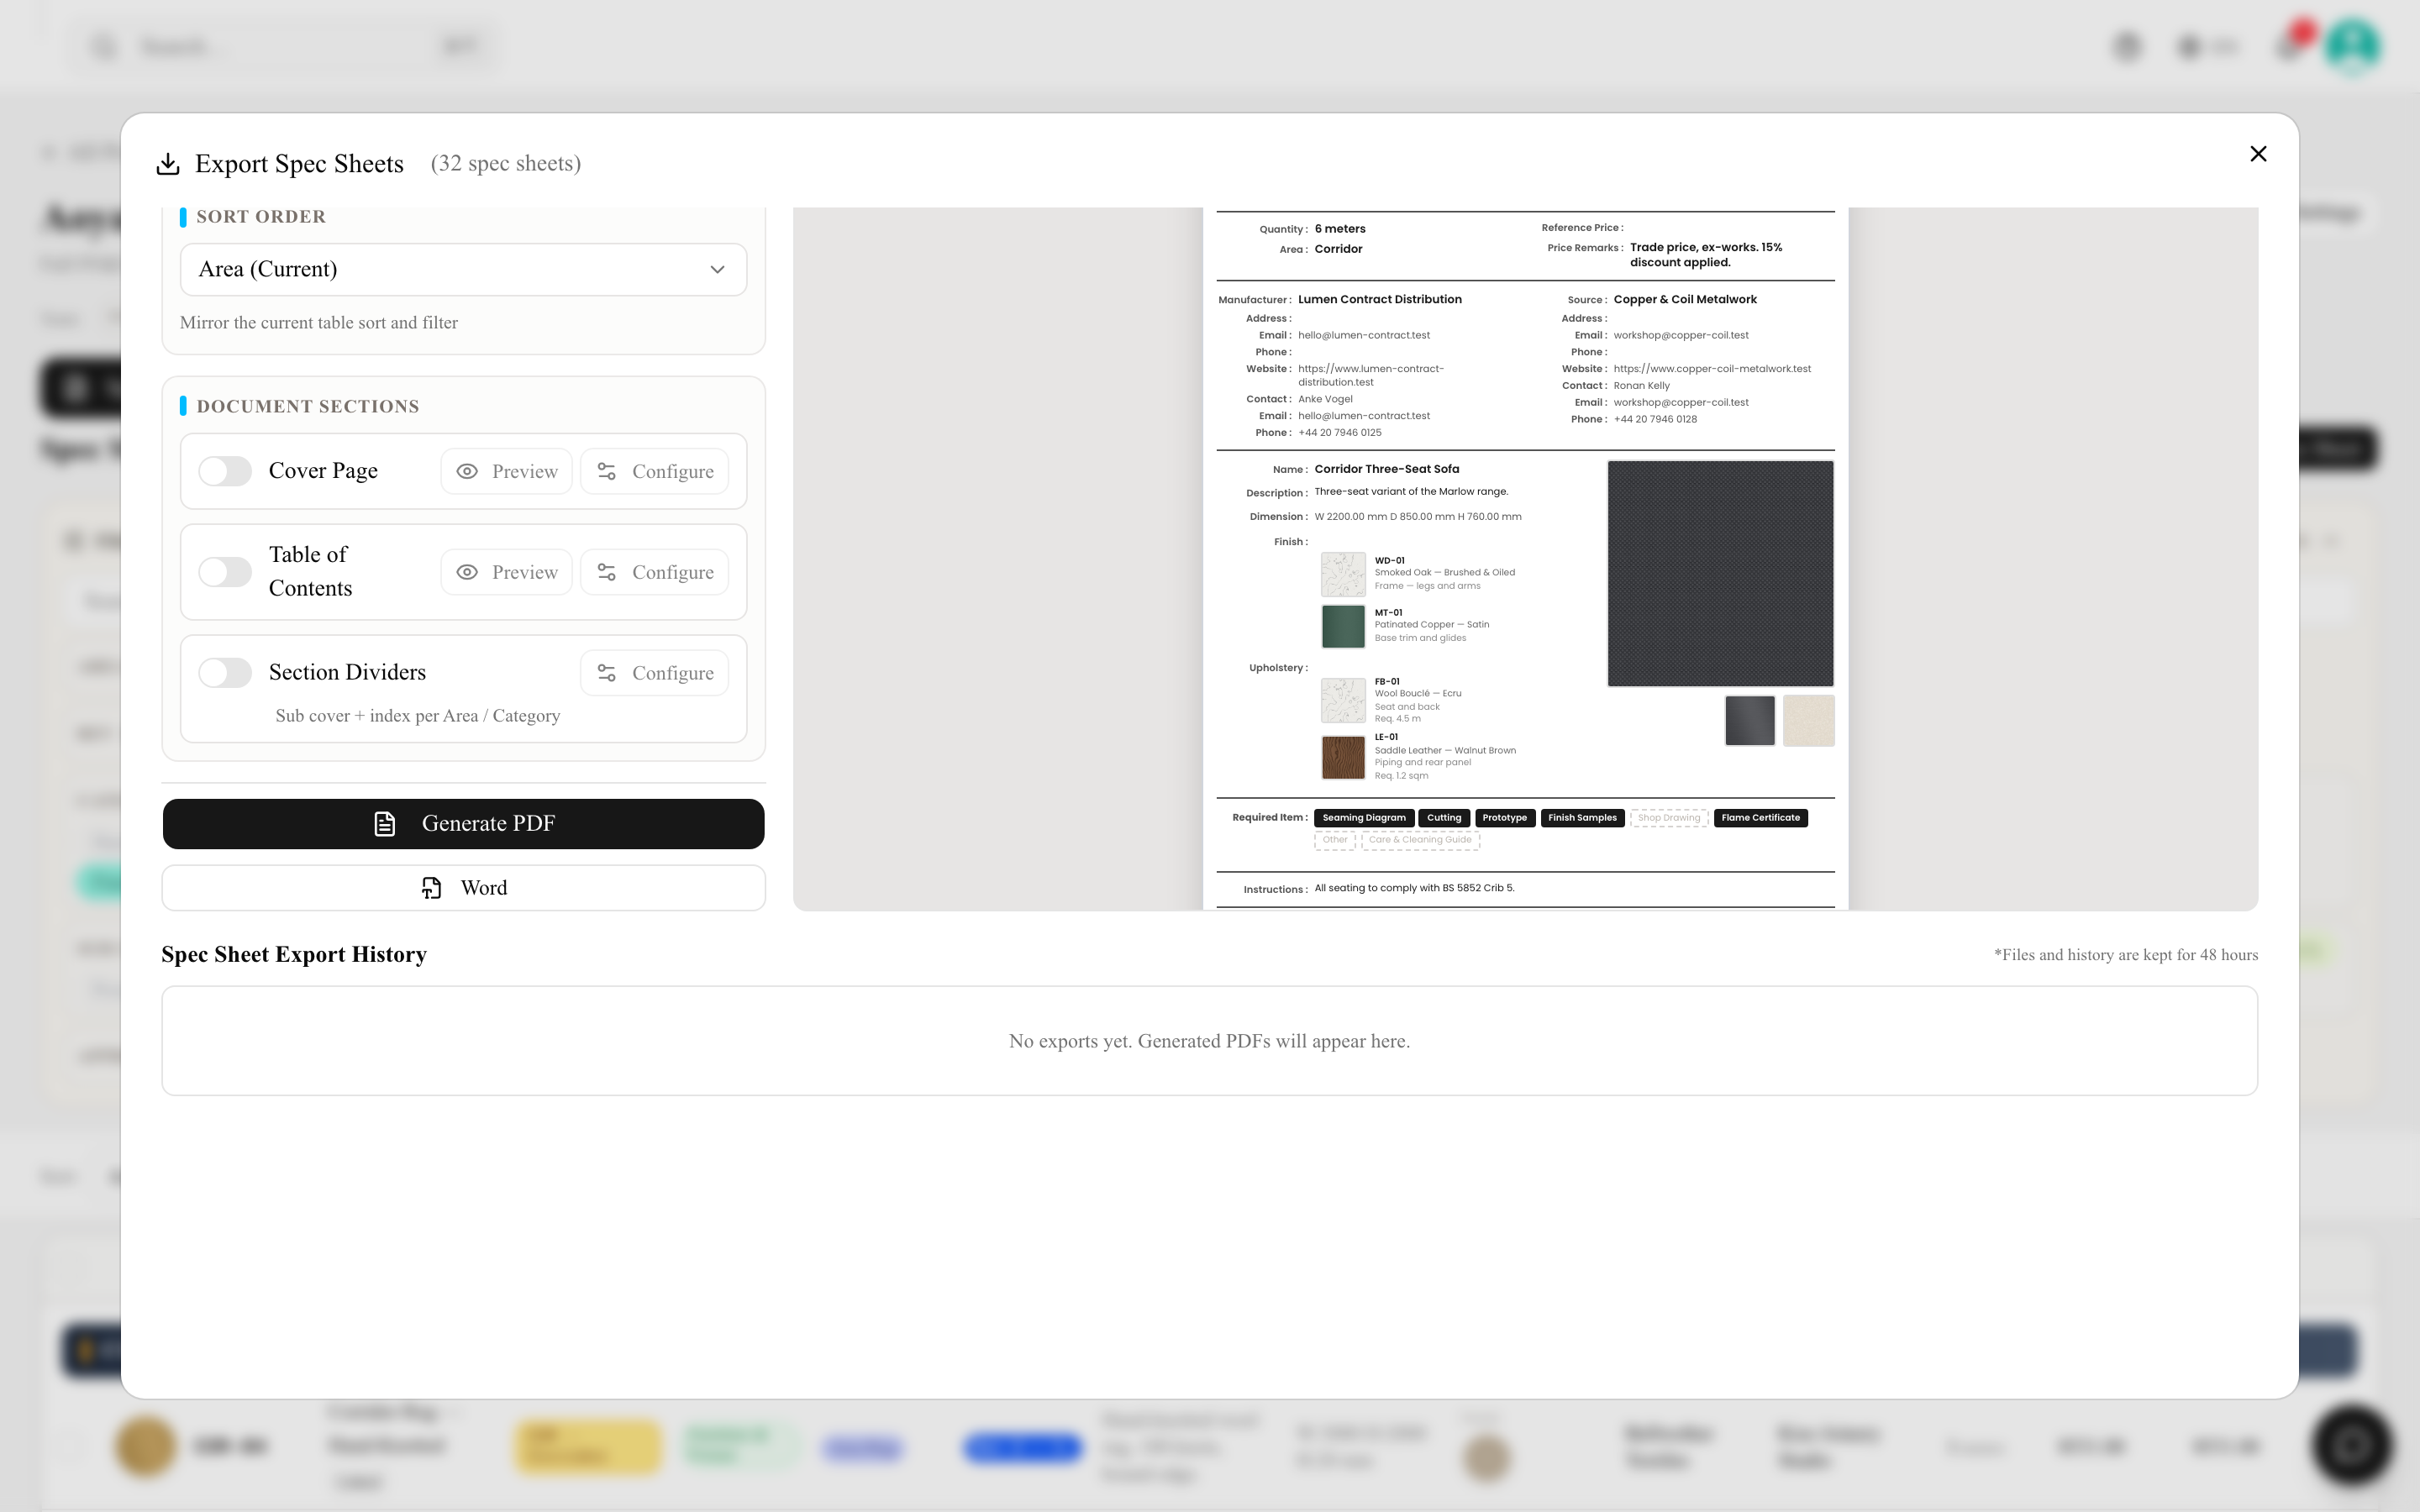
Cover Page — every field is independently toggleable: Workspace Logo, Project Name, Project Code, Studio / Company Name, Client Name, Date, Revision. Add Custom Notes (free text below the title block) and an optional cover Image. Preview renders the cover on its own. The cover's Date is the day you start the export, in your own time zone, written out in full in the project's Spec Sheet Primary Language (3 October 2026; 2026年10月3日 for a Japanese project — on a Second Only export, in the second language) — the preview shows the same day. Custom Notes keep their formatting on the printed cover: headings, bulleted and numbered lists, bold and colour.
Table of Contents — an index page of everything included. Pick from ten columns: Item Code, Item Name, Area, Category, Sub Category, Revision, Supplier, Manufacturer, Approval, Quantity. Preview renders the index on its own. On a Second Only or Show Both export the TOC headers print in the same language as the sheets they index. The item count beside the project name ("12 items") follows the Spec Sheet Primary Language as well.
Section Dividers — a sub cover plus a mini index between groups. Eight controls: divide By Area, divide By Category, divide By Sub Category (they combine — an Area divider can carry Category sub-dividers inside it), Include mini index on each divider, Show Logo, Show Project Name, the mini index's Contents Columns (Item Code, Item Name, Revision, Supplier, Manufacturer, Quantity), and an optional divider Image. Dividers are independent of Sort Order, so you can insert them even on Table Order. With Show Both or Second Only, an area divider's title also carries the area's second-language name ("Bar / バー", or "バー"); a second-language name identical to the first is not printed.
Cover pages, tables of contents and section dividers are export options only. They are not project settings, and there is nothing to configure for them outside this dialog.
The live preview
The right-hand side renders the real pages as you change the settings.
- Tabs — All (cover, TOC and every spec page, scrollable), Cover, TOC.
- Zoom out / Fit / Zoom in — click the percentage to snap back to Fit.
- 1, 2 or 3 page(s) across — review a long book several pages at a time.
- Fullscreen, and Reload preview for when you have just changed a sheet in another tab.
On a long book the first pages appear straight away and the rest fill in behind them; while sheets are still loading, a bar under the toolbar counts them (Rendering preview… 42 / 246 spec sheets). The preview is kept while the project page stays open: close the dialog and open it again and it is back at once — only sheets edited in the meantime are fetched again.
Generating
Click Generate PDF. Rendering runs in the background, so you can keep working. When it finishes the file appears under Spec Sheet Export History below the settings, with its type, mode, sheet count, status, size, Created / Completed / Expires timestamps, and a Download button. Rows you have already fetched are marked Downloaded and can be downloaded again.
While the file is being made, a progress row above the history shows the stage — Queued, Preparing, Rendering, Merging pages, Uploading — how many spec sheets are done out of the total, how many pages have been rendered, and the time elapsed. You can keep browsing the preview meanwhile. When it finishes, the row turns into a Download PDF (or Download ZIP) link; if it fails, the row shows why.
Very large exports are delivered in parts. A book that is too big for one file (about 200 MB by default) is split automatically into several files — the history row and the progress row then show Download (3 parts) instead of a single link, and the menu lists Part 1 of 3, Part 2 of 3 … with each part's size. Page numbers continue from one part to the next, so the parts read as one document; the cover and table of contents are in part 1. Nothing is refused for size — a project of several thousand sheets simply produces more parts.
The downloaded file is named after the project and the day of the export — Project name_SpecSheets_YYYYMMDD.pdf; the parts of a multi-part export add _part01of03 and so on.
Files and history are kept for 48 hours. Archive anything you issue — see Backup and export. Deleting an export from the history while it is still queued or rendering cancels it: the work stops and no file is made.
If the server restarts while an export is rendering, the row is marked failed within a few minutes with "The server restarted while this export was running. Please generate it again." instead of spinning — press Generate PDF again. An export that never got to start is marked failed with "This export could not start: the PDF server was busy or restarted before it began. Please generate it again." While the server is short of memory a queued export waits, but never for more than about two minutes when no other export is rendering.
Word, Excel and CSV
The same dialog exports data, using the same language, cover, TOC and divider settings:
- Word — always available; follows the layout you chose.
- Excel and CSV Export — shown on the List views, where a row-per-sheet table is what you actually want. A Columns popover beside them decides which fields the two carry, and fields that have a translation follow the Language setting. Use these for quantity surveys, ordering and cost plans.
The Config settings (Finish & upholstery layout, Printed fields and Show when empty) apply to PDF spec sheet pages only. Word, Excel and CSV exports are not affected by them. An empty Quantity is left out of a Word spec sheet just as it is from the PDF, and is an empty cell in Excel and CSV.
In a CSV file, a cell that begins with =, +, - or @ is written with a leading apostrophe (') so that Excel or Google Sheets shows it as text instead of running it as a formula. Plain numbers such as -5 and phone numbers such as +81 3-1234-5678 (only digits, spaces and ( ) - . /) are written as they are — nothing in them can run as a formula. Excel may still show such a phone number as a calculated value when it opens the file; import the column as text if that happens.
Dual-language documents
If the project has a second language enabled, Show Both renders both languages together — one spec book for a project where the client and the contractor read different languages. The field labels come from Settings → Labels; see Language settings.
A translation that reads the same as the value it belongs to is printed only once. In Show Both, a second-language value that matches the primary — ignoring formatting, spacing and letter case — is left out of PDF pages, the table of contents and Word, and the second-language Product Name column in Excel and CSV is left blank for that row. This always applies; there is no setting for it. Nothing stored is changed: the sheet editor still shows the saved second-language value, and workspace backups keep both values exactly as stored. You will see this most on sheets imported without an English name, where the name was filled from the second-language name.
Troubleshooting
- Images missing — check the sheet actually has a main image; sub images render according to the template.
- Fields cut off — very long free-text fields may truncate on compact layouts. Switch to a fuller view or template.
- Old data in the export — an export is a snapshot of the moment you generated it. Re-export after editing, and check you are sharing the newest row in the history.
- The export expired — history is kept for 48 hours only. Generate it again.